I still remember sitting in my driveway, gripping the steering wheel, and wondering if my teeth were actually trying to escape my mouth. I’d just come from my orthodontic adjustment, and for the first ten minutes, I felt fine—brave, even. Then, the ‘throb’ arrived. It wasn’t a sharp pain, but a heavy, relentless pressure that made me want to go back and ask for my old wires. I’ve been there, and if you’re reading this while holding an ice pack to your face, I feel your pain. I once made the absolute bonehead mistake of trying to eat a crusty baguette just hours after a tightening; let’s just say I learned my lesson about what to eat when your braces are first put on and adjusted. Today, I’m going to share exactly how I managed that dull ache so you don’t have to suffer through your next adjustment. Have you ever felt like your teeth were being moved by a tiny, invisible construction crew? Leave a comment and let me know your worst ‘tightening day’ story!
The Moment the Pressure Kicks In
Orthodontic adjustments are a necessary evil for that perfect smile, but they don’t have to be a nightmare. When your orthodontist tightens those wires, they are essentially recalibrating the force applied to your teeth. According to research published in the Journal of International Oral Health, this discomfort usually peaks about 24 hours after the appointment. It’s a biological response to pressure, but that doesn’t mean we have to sit there and take it. I used to think I just had to ‘tough it out,’ but that’s a myth that leads to a very grumpy week. If you’re also dealing with mouth sores caused by orthodontic brackets on top of the ache, the misery can double. We’re going to fix that today by looking at proactive ways to soothe the inflammation.
Does it have to be this miserable every time?
I know what you’re thinking: Is this constant dull ache actually worth the hype of a straighter smile? When you’re in the thick of it, it’s hard to see the finish line. My biggest mistake early on was ignoring the advice from my family dentistry provider about early intervention. I waited until I was in full-blown throbbing pain before I even thought about a cold compress or a salt-water rinse. You don’t have to wait. There are ways to stay ahead of the discomfort rather than chasing it after it’s already taken hold.
Stop the Squeeze Before it Starts
The secret isn’t just one magic trick; it’s a combination of timing and environment. I found that if I treated my mouth like it was ‘recovering’ before the pain even peaked, the whole experience changed. It’s about managing the inflammation in the periodontal ligament before it sends those loud signals to your brain. If you find your pain isn’t the ‘normal’ ache but feels more like a structural issue, you might want to reach out to a professional just to be safe. But for most of us, it’s just the price of progress—a price we can definitely lower with the right home-care strategy.
Use the Freezer to Your Advantage
Think of your teeth as a group of hikers moving through thick mud. The adjustment is the guide pushing them to walk faster; there is going to be friction and soreness. The most immediate relief comes from lowering the temperature in your mouth. Cold water acts as a local anesthetic, numbing the area and reducing the blood flow that causes that heavy, pulsing sensation. I make it a point to sip on ice water for at least three hours post-appointment. It’s a simple trick, but it keeps the inflammation from spiraling out of control. If you’ve ever noticed why your teeth throb during exercise, you know that increased blood flow is the enemy of comfort right now.
Why a cold compress beats a heating pad
While a heating pad might feel cozy for a sore back, heat is the last thing you want near your jaw after a tightening. Heat expands blood vessels, which can actually increase the pressure on the periodontal ligaments. Stick to an ice pack on the outside of your jaw for 15-minute intervals. This external cooling works in tandem with the ice water to create a ‘numbing sandwich’ for your nerves.
Don’t Let the Metal Shred Your Cheeks
Sometimes the pain isn’t just the pressure; it’s the physical hardware. When wires are adjusted, they might sit slightly differently than before, leading to new ‘hot spots’ on your inner lips. I once spent an entire afternoon trying to ignore a sharp poke from a wire, thinking I could just ‘break in’ my cheek. By dinner, I had a painful ulcer that made even talking difficult. Use your wax early. If you feel even a hint of a scratch, dry the bracket with a cotton swab and smoosh a pea-sized amount of wax over it. This creates a smooth buffer so your mouth can heal. This is the best way to prevent your braces from making your cheeks feel raw and inflamed. 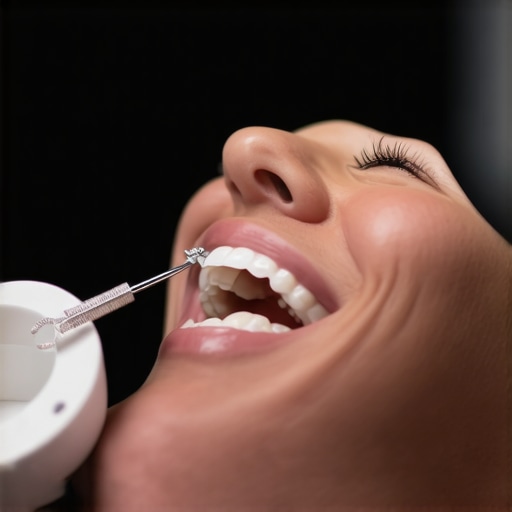
The secret to getting wax to actually stay put
The biggest mistake I made early on was trying to put wax on a wet bracket. It’s like trying to tape a wet fish—it just won’t stick. You have to get the area bone-dry. I use a clean paper towel or a Q-tip to dab the bracket before applying the wax. Once it’s on, leave it alone. If you’re also struggling with mouth sores caused by orthodontic brackets, this barrier is your primary defense.
Salt Water Rises as the Unsung Hero
It sounds like something your grandmother would suggest, but a warm salt water rinse is scientifically sound. The salt helps draw out fluid from inflamed tissues, which reduces swelling through osmosis. I usually mix half a teaspoon of salt into eight ounces of warm water and swish it gently for thirty seconds. The first time I did this, I was skeptical, but the relief was almost instantaneous because it cleaned out the areas where hardware was irritating my gums. It’s a low-cost way to speed up the healing process while you work toward those cosmetic dentistry secrets that will eventually make all this hassle worth it.
Choose Your Meals Like a Professional
Your teeth are essentially ‘bruised’ for the first 48 hours. You wouldn’t go for a run on a sprained ankle, so don’t ask your teeth to grind down a steak. Stick to the basics: smoothies, mashed potatoes, and yogurt. I’ve found that even ‘soft’ bread can be surprisingly tough when your alignment is shifting. If you’re unsure what to stock up on, check out this guide on what to eat when your braces are first put on for some pain-free inspiration.
Stop the Unconscious Clenching
When your mouth hurts, your natural instinct is to clench your jaw. This is the absolute worst thing you can do because it adds mechanical pressure to already stressed ligaments. It’s a bit like pressing on a bruise over and over again. I had to train myself to keep ‘lips together, teeth apart.’ If you find yourself tensing up, you need to learn how to stop clenching your jaw to give your mouth a fighting chance at recovery. Focusing on relaxing your tongue against the roof of your mouth can help break that cycle of tension.I still remember sitting in my driveway, gripping the steering wheel, and wondering if my teeth were actually trying to escape my mouth. I’d just come from my orthodontic adjustment, and for the first ten minutes, I felt fine—brave, even. Then, the ‘throb’ arrived. It wasn’t a sharp pain, but a heavy, relentless pressure that made me want to go back and ask for my old wires. I’ve been there, and if you’re reading this while holding an ice pack to your face, I feel your pain. I once made the absolute bonehead mistake of trying to eat a crusty baguette just hours after a tightening; let’s just say I learned my lesson about what to eat when your braces are first put on and adjusted. Today, I’m going to share exactly how I managed that dull ache so you don’t have to suffer through your next adjustment. Have you ever felt like your teeth were being moved by a tiny, invisible construction crew? Leave a comment and let me know your worst ‘tightening day’ story!
The Moment the Pressure Kicks In
Orthodontic adjustments are a necessary evil for that perfect smile, but they don’t have to be a nightmare. When your orthodontist tightens those wires, they are essentially recalibrating the force applied to your teeth. According to research published in the Journal of International Oral Health, this discomfort usually peaks about 24 hours after the appointment. It’s a biological response to pressure, but that doesn’t mean we have to sit there and take it. I used to think I just had to ‘tough it out,’ but that’s a myth that leads to a very grumpy week. If you’re also dealing with mouth sores caused by orthodontic brackets on top of the ache, the misery can double. We’re going to fix that today by looking at proactive ways to soothe the inflammation.
Does it have to be this miserable every time?
I know what you’re thinking: Is this constant dull ache actually worth the hype of a straighter smile? When you’re in the thick of it, it’s hard to see the finish line. My biggest mistake early on was ignoring the advice from my family dentistry provider about early intervention. I waited until I was in full-blown throbbing pain before I even thought about a cold compress or a salt-water rinse. You don’t have to wait. There are ways to stay ahead of the discomfort rather than chasing it after it’s already taken hold.
Stop the Squeeze Before it Starts
The secret isn’t just one magic trick; it’s a combination of timing and environment. I found that if I treated my mouth like it was ‘recovering’ before the pain even peaked, the whole experience changed. It’s about managing the inflammation in the periodontal ligament before it sends those loud signals to your brain. If you find your pain isn’t the ‘normal’ ache but feels more like a structural issue, you might want to reach out to a professional just to be safe. But for most of us, it’s just the price of progress—a price we can definitely lower with the right home-care strategy.
Use the Freezer to Your Advantage
Think of your teeth as a group of hikers moving through thick mud. The adjustment is the guide pushing them to walk faster; there is going to be friction and soreness. The most immediate relief comes from lowering the temperature in your mouth. Cold water acts as a local anesthetic, numbing the area and reducing the blood flow that causes that heavy, pulsing sensation. I make it a point to sip on ice water for at least three hours post-appointment. It’s a simple trick, but it keeps the inflammation from spiraling out of control. If you’ve ever noticed why your teeth throb during exercise, you know that increased blood flow is the enemy of comfort right now.
Why a cold compress beats a heating pad
While a heating pad might feel cozy for a sore back, heat is the last thing you want near your jaw after a tightening. Heat expands blood vessels, which can actually increase the pressure on the periodontal ligaments. Stick to an ice pack on the outside of your jaw for 15-minute intervals. This external cooling works in tandem with the ice water to create a ‘numbing sandwich’ for your nerves.
Don’t Let the Metal Shred Your Cheeks
Sometimes the pain isn’t just the pressure; it’s the physical hardware. When wires are adjusted, they might sit slightly differently than before, leading to new ‘hot spots’ on your inner lips. I once spent an entire afternoon trying to ignore a sharp poke from a wire, thinking I could just ‘break in’ my cheek. By dinner, I had a painful ulcer that made even talking difficult. Use your wax early. If you feel even a hint of a scratch, dry the bracket with a cotton swab and smoosh a pea-sized amount of wax over it. This creates a smooth buffer so your mouth can heal. This is the best way to prevent your braces from making your cheeks feel raw and inflamed. #IMAGE_PLACE_HOLDER_B#
The secret to getting wax to actually stay put
The biggest mistake I made early on was trying to put wax on a wet bracket. It’s like trying to tape a wet fish—it just won’t stick. You have to get the area bone-dry. I use a clean paper towel or a Q-tip to dab the bracket before applying the wax. Once it’s on, leave it alone. If you’re also struggling with mouth sores caused by orthodontic brackets, this barrier is your primary defense.
Salt Water Rises as the Unsung Hero
It sounds like something your grandmother would suggest, but a warm salt water rinse is scientifically sound. The salt helps draw out fluid from inflamed tissues, which reduces swelling through osmosis. I usually mix half a teaspoon of salt into eight ounces of warm water and swish it gently for thirty seconds. The first time I did this, I was skeptical, but the relief was almost instantaneous because it cleaned out the areas where hardware was irritating my gums. It’s a low-cost way to speed up the healing process while you work toward those cosmetic dentistry secrets that will eventually make all this hassle worth it.
Choose Your Meals Like a Professional
Your teeth are essentially ‘bruised’ for the first 48 hours. You wouldn’t go for a run on a sprained ankle, so don’t ask your teeth to grind down a steak. Stick to the basics: smoothies, mashed potatoes, and yogurt. I’ve found that even ‘soft’ bread can be surprisingly tough when your alignment is shifting. If you’re unsure what to stock up on, check out this guide on what to eat when your braces are first put on for some pain-free inspiration.
Stop the Unconscious Clenching
When your mouth hurts, your natural instinct is to clench your jaw. This is the absolute worst thing you can do because it adds mechanical pressure to already stressed ligaments. It’s a bit like pressing on a bruise over and over again. I had to train myself to keep ‘lips together, teeth apart.’ If you find yourself tensing up, you need to learn how to stop clenching your jaw to give your mouth a fighting chance at recovery. Focusing on relaxing your tongue against the roof of your mouth can help break that cycle of tension.
Why Your New Smile Might Look Fake in Direct Sunlight
While many of us start our journey with braces, we often graduate into the world of aesthetic refinements. A common contrarian view I hold is that ‘perfection’ is actually the enemy of a great smile. Most people think veneers are a simple ‘set it and forget it’ cosmetic fix, but they are a sophisticated medical prosthetic. If you prioritize extreme whiteness over natural translucency, you’ll fall into the mistake that makes your teeth look too white and fake. Real teeth have depth; they interact with light. This is exactly the reason your veneers look different in sunlight—poorly designed porcelain lacks the internal ‘bounce’ of natural enamel. A high-end veneers transformation requires a dentist who understands the physics of light, not just the mechanics of glue. #IMAGE_PLACE_HOLDER_C#
Should you opt for immediate load implants if you have bone loss?
This is the ‘oops’ factor that haunts many dental patients. We live in an era of ‘teeth in a day,’ but rushing into dental implants when your jaw foundation is weak is a recipe for disaster. According to the Journal of Oral Implantology, primary stability is the single biggest predictor of long-term success. If you’re looking into the truth about getting dental implants if you have existing bone loss, you must understand that skipping a bone graft just to save three months of healing time is a trap. Without adequate bone density, you might eventually wonder why your dental implant feels like it is vibrating slightly or feels unstable when you chew.
The Hidden Danger of Choosing Speed Over Foundation
Expertise in family dentistry means knowing when to say ‘wait.’ Whether it’s letting your jaw recover from an orthodontic adjustment or waiting for a bone graft to take before placing an implant, the foundation is everything. Modern technology is incredible—it’s the reason your Culpeper dentist uses CBCT scans to map your nerves in 3D—but it can’t override the body’s natural healing timeline. If you’re chasing cosmetic dentistry secrets to improve your look, remember that the most confident smiles are the ones that are structurally sound. Have you ever fallen into the trap of choosing the ‘fast’ dental option over the ‘right’ one? Let me know in the comments!Keeping your new smile pristine isn’t just about brushing; it’s about having the right specialized gear. I learned the hard way that once you invest in a veneers transformation, your standard drug-store toothpaste can actually be your worst enemy. Most people don’t realize that standard whitening pastes are often abrasive. According to the American Academy of Cosmetic Dentistry (AACD), using products with high Relative Dentin Abrasivity (RDA) scores can micro-scratch the surface of your porcelain, leading to dullness over time. I personally switched to a non-abrasive gel toothpaste to ensure my investment stays as glossy as day one. If you’re noticing that maintaining your white smile after a coffee habit is getting harder, it might be those microscopic scratches catching the stains.
The toolkit you actually need for high-end dental work
If you have implants, you need to understand that the connection between the titanium and your gum is different from a natural tooth root. I’ve seen people panic because their dental implant crown feels slightly wiggly when you bite, and often it’s due to poor hygiene leading to inflammation around the abutment. I swear by a high-quality water flosser. Traditional string floss is great, but when you’re dealing with the intricate nooks of a bridge or an implant, a pressurized stream of water gets into the gaps that a string simply can’t reach. It’s also much more comfortable than trying to find the secret to flossing comfortably with a permanent retainer if you have orthodontic work still in place. 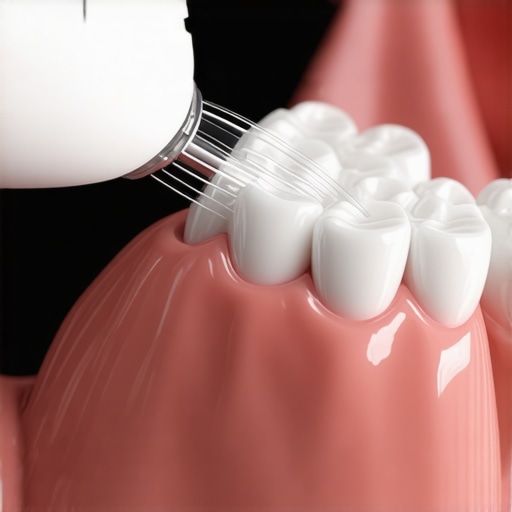
How do I keep my new smile looking brand new for a decade?
Maintenance is a daily commitment to moisture and gentle friction. I recommend using a soft-bristled electric toothbrush with a pressure sensor. I’ve found that my ‘heavy-handed’ brushing was actually pushing my gums back, which is a disaster for anyone with veneers. If you see the edge of the porcelain, the illusion is broken. Beyond the tools, you have to stay on top of your family dentistry tips for a lifetime of healthy smiles, which means professional cleanings every six months—no exceptions. These appointments allow your dentist to check for ‘micro-leaks’ around the margins of your work before they become expensive failures.
Why bio-active coatings are the next big thing
Looking ahead, the future of dental implants is incredibly exciting. We are moving toward bio-active glass coatings that actually encourage bone to bond even faster to the implant surface. This trend toward ‘smarter’ materials will likely make the healing process for dental implants even more predictable. If you haven’t yet, I strongly suggest you reach out to a professional to discuss a long-term maintenance plan tailored to your specific hardware. Try switching to a water flosser for just one week—you’ll be shocked at what your manual brush has been leaving behind!I still remember sitting in my driveway, gripping the steering wheel, and wondering if my teeth were actually trying to escape my mouth. I’d just come from my orthodontic adjustment, and for the first ten minutes, I felt fine—brave, even. Then, the ‘throb’ arrived. It wasn’t a sharp pain, but a heavy, relentless pressure that made me want to go back and ask for my old wires. I’ve been there, and if you’re reading this while holding an ice pack to your face, I feel your pain. I once made the absolute bonehead mistake of trying to eat a crusty baguette just hours after a tightening; let’s just say I learned my lesson about what to eat when your braces are first put on and adjusted. Today, I’m going to share exactly how I managed that dull ache so you don’t have to suffer through your next adjustment. Have you ever felt like your teeth were being moved by a tiny, invisible construction crew? Leave a comment and let me know your worst ‘tightening day’ story!
The Moment the Pressure Kicks In
Orthodontic adjustments are a necessary evil for that perfect smile, but they don’t have to be a nightmare. When your orthodontist tightens those wires, they are essentially recalibrating the force applied to your teeth. According to research published in the Journal of International Oral Health, this discomfort usually peaks about 24 hours after the appointment. It’s a biological response to pressure, but that doesn’t mean we have to sit there and take it. I used to think I just had to ‘tough it out,’ but that’s a myth that leads to a very grumpy week. If you’re also dealing with mouth sores caused by orthodontic brackets on top of the ache, the misery can double. We’re going to fix that today by looking at proactive ways to soothe the inflammation.
Does it have to be this miserable every time?
I know what you’re thinking: Is this constant dull ache actually worth the hype of a straighter smile? When you’re in the thick of it, it’s hard to see the finish line. My biggest mistake early on was ignoring the advice from my family dentistry provider about early intervention. I waited until I was in full-blown throbbing pain before I even thought about a cold compress or a salt-water rinse. You don’t have to wait. There are ways to stay ahead of the discomfort rather than chasing it after it’s already taken hold.
Stop the Squeeze Before it Starts
The secret isn’t just one magic trick; it’s a combination of timing and environment. I found that if I treated my mouth like it was ‘recovering’ before the pain even peaked, the whole experience changed. It’s about managing the inflammation in the periodontal ligament before it sends those loud signals to your brain. If you find your pain isn’t the ‘normal’ ache but feels more like a structural issue, you might want to reach out to a professional just to be safe. But for most of us, it’s just the price of progress—a price we can definitely lower with the right home-care strategy.
Use the Freezer to Your Advantage
Think of your teeth as a group of hikers moving through thick mud. The adjustment is the guide pushing them to walk faster; there is going to be friction and soreness. The most immediate relief comes from lowering the temperature in your mouth. Cold water acts as a local anesthetic, numbing the area and reducing the blood flow that causes that heavy, pulsing sensation. I make it a point to sip on ice water for at least three hours post-appointment. It’s a simple trick, but it keeps the inflammation from spiraling out of control. If you’ve ever noticed why your teeth throb during exercise, you know that increased blood flow is the enemy of comfort right now.
Why a cold compress beats a heating pad
While a heating pad might feel cozy for a sore back, heat is the last thing you want near your jaw after a tightening. Heat expands blood vessels, which can actually increase the pressure on the periodontal ligaments. Stick to an ice pack on the outside of your jaw for 15-minute intervals. This external cooling works in tandem with the ice water to create a ‘numbing sandwich’ for your nerves.
Don’t Let the Metal Shred Your Cheeks
Sometimes the pain isn’t just the pressure; it’s the physical hardware. When wires are adjusted, they might sit slightly differently than before, leading to new ‘hot spots’ on your inner lips. I once spent an entire afternoon trying to ignore a sharp poke from a wire, thinking I could just ‘break in’ my cheek. By dinner, I had a painful ulcer that made even talking difficult. Use your wax early. If you feel even a hint of a scratch, dry the bracket with a cotton swab and smoosh a pea-sized amount of wax over it. This creates a smooth buffer so your mouth can heal. This is the best way to prevent your braces from making your cheeks feel raw and inflamed.
The secret to getting wax to actually stay put
The biggest mistake I made early on was trying to put wax on a wet bracket. It’s like trying to tape a wet fish—it just won’t stick. You have to get the area bone-dry. I use a clean paper towel or a Q-tip to dab the bracket before applying the wax. Once it’s on, leave it alone. If you’re also struggling with mouth sores caused by orthodontic brackets, this barrier is your primary defense.
Salt Water Rises as the Unsung Hero
It sounds like something your grandmother would suggest, but a warm salt water rinse is scientifically sound. The salt helps draw out fluid from inflamed tissues, which reduces swelling through osmosis. I usually mix half a teaspoon of salt into eight ounces of warm water and swish it gently for thirty seconds. The first time I did this, I was skeptical, but the relief was almost instantaneous because it cleaned out the areas where hardware was irritating my gums. It’s a low-cost way to speed up the healing process while you work toward those cosmetic dentistry secrets that will eventually make all this hassle worth it.
Choose Your Meals Like a Professional
Your teeth are essentially ‘bruised’ for the first 48 hours. You wouldn’t go for a run on a sprained ankle, so don’t ask your teeth to grind down a steak. Stick to the basics: smoothies, mashed potatoes, and yogurt. I’ve found that even ‘soft’ bread can be surprisingly tough when your alignment is shifting. If you’re unsure what to stock up on, check out this guide on what to eat when your braces are first put on for some pain-free inspiration.
Stop the Unconscious Clenching
When your mouth hurts, your natural instinct is to clench your jaw. This is the absolute worst thing you can do because it adds mechanical pressure to already stressed ligaments. It’s a bit like pressing on a bruise over and over again. I had to train myself to keep ‘lips together, teeth apart.’ If you find yourself tensing up, you need to learn how to stop clenching your jaw to give your mouth a fighting chance at recovery. Focusing on relaxing your tongue against the roof of your mouth can help break that cycle of tension.
Why Your New Smile Might Look Fake in Direct Sunlight
While many of us start our journey with braces, we often graduate into the world of aesthetic refinements. A common contrarian view I hold is that ‘perfection’ is actually the enemy of a great smile. Most people think veneers are a simple ‘set it and forget it’ cosmetic fix, but they are a sophisticated medical prosthetic. If you prioritize extreme whiteness over natural translucency, you’ll fall into the mistake that makes your teeth look too white and fake. Real teeth have depth; they interact with light. This is exactly the reason your veneers look different in sunlight—poorly designed porcelain lacks the internal ‘bounce’ of natural enamel. A high-end veneers transformation requires a dentist who understands the physics of light, not just the mechanics of glue. #IMAGE_PLACE_HOLDER_C#
Should you opt for immediate load implants if you have bone loss?
This is the ‘oops’ factor that haunts many dental patients. We live in an era of ‘teeth in a day,’ but rushing into dental implants when your jaw foundation is weak is a recipe for disaster. According to the Journal of Oral Implantology, primary stability is the single biggest predictor of long-term success. If you’re looking into the truth about getting dental implants if you have existing bone loss, you must understand that skipping a bone graft just to save three months of healing time is a trap. Without adequate bone density, you might eventually wonder why your dental implant feels like it is vibrating slightly or feels unstable when you chew.
The Hidden Danger of Choosing Speed Over Foundation
Expertise in family dentistry means knowing when to say ‘wait.’ Whether it’s letting your jaw recover from an orthodontic adjustment or waiting for a bone graft to take before placing an implant, the foundation is everything. Modern technology is incredible—it’s the reason your Culpeper dentist uses CBCT scans to map your nerves in 3D—but it can’t override the body’s natural healing timeline. If you’re chasing cosmetic dentistry secrets to improve your look, remember that the most confident smiles are the ones that are structurally sound. Keeping your new smile pristine isn’t just about brushing; it’s about having the right specialized gear. I learned the hard way that once you invest in a veneers transformation, your standard drug-store toothpaste can actually be your worst enemy. Most people don’t realize that standard whitening pastes are often abrasive. According to the American Academy of Cosmetic Dentistry (AACD), using products with high Relative Dentin Abrasivity (RDA) scores can micro-scratch the surface of your porcelain, leading to dullness over time. I personally switched to a non-abrasive gel toothpaste to ensure my investment stays as glossy as day one. If you’re noticing that maintaining your white smile after a coffee habit is getting harder, it might be those microscopic scratches catching the stains.
The toolkit you actually need for high-end dental work
If you have implants, you need to understand that the connection between the titanium and your gum is different from a natural tooth root. I’ve seen people panic because their dental implant crown feels slightly wiggly when you bite, and often it’s due to poor hygiene leading to inflammation around the abutment. I swear by a high-quality water flosser. Traditional string floss is great, but when you’re dealing with the intricate nooks of a bridge or an implant, a pressurized stream of water gets into the gaps that a string simply can’t reach. It’s also much more comfortable than trying to find the secret to flossing comfortably with a permanent retainer if you have orthodontic work still in place.
How do I keep my new smile looking brand new for a decade?
Maintenance is a daily commitment to moisture and gentle friction. I recommend using a soft-bristled electric toothbrush with a pressure sensor. I’ve found that my ‘heavy-handed’ brushing was actually pushing my gums back, which is a disaster for anyone with veneers. If you see the edge of the porcelain, the illusion is broken. Beyond the tools, you have to stay on top of your family dentistry tips for a lifetime of healthy smiles, which means professional cleanings every six months—no exceptions. These appointments allow your dentist to check for ‘micro-leaks’ around the margins of your work before they become expensive failures.
Why bio-active coatings are the next big thing
Looking ahead, the future of dental implants is incredibly exciting. We are moving toward bio-active glass coatings that actually encourage bone to bond even faster to the implant surface. This trend toward ‘smarter’ materials will likely make the healing process for dental implants even more predictable. If you haven’t yet, I strongly suggest you reach out to a professional to discuss a long-term maintenance plan tailored to your specific hardware.
What Nobody Mentions About the Lifetime of a Perfect Smile
Living with advanced work like veneers or implants isn’t just about the procedure day; it’s about the decades that follow. The ‘halo effect’ of a great smile can change your social life, but if you treat your new teeth like indestructible tools, you’ll be back in the chair sooner than you want. I learned that even a veneers transformation requires a sensory shift; your bite will feel ‘different’ for a few weeks while your brain maps the new boundaries. Don’t rush the process; patience is a medical necessity for bone bonding, especially if you are investigating how dental implants reshape your oral health in 2025. Proper nutrition and hydration are just as important as your toothbrush for ensuring those implants integrate correctly with your jaw.
How I Build My Daily Defense Strategy
I personally swear by a three-step toolkit to keep my smile at 100%. First, the water flosser is non-negotiable—it is truly the secret to flossing comfortably with a permanent retainer or an implant bridge. Second, always choose pH-neutral, non-abrasive gels; standard whitening pastes can micro-scratch porcelain and make maintaining your white smile after a coffee habit nearly impossible. Finally, follow family dentistry tips for a lifetime of healthy smiles to avoid over-aggressive brushing that causes gum recession. #IMAGE_PLACEHOLDER_E#
Take the First Step Toward Your Most Confident Self
Whether you are currently nursing a sore jaw after a tightening or you are planning a complete cosmetic overhaul, remember that a beautiful smile is built on health first. Use these cosmetic dentistry secrets to boost your confidence and never settle for a ‘fast’ fix when a foundation-first approach is available. Your future self will thank you for the patience and care you invest today. Have you ever been surprised by how much maintenance a new dental procedure actually takes? Let me know your experience in the comments below!