I will never forget the sheer, unadulterated relief of having my braces removed. I spent ten minutes just licking my teeth in the car, marveling at how smooth they felt. But then came the first night of real life with my new permanent retainer. I stood in front of the bathroom mirror with a piece of floss, feeling like I was trying to thread a needle in the dark during an earthquake. I actually snapped the floss and made my gums bleed because I was being so aggressive and impatient. It was a total mess. I honestly thought about calling my orthodontist the next morning and asking them to just rip the wire out right then and there. If you have ever felt that specific brand of dental frustration, you are definitely not alone. Today, I am going to show you exactly how to stop the bleeding and start flossing like a pro, because that little wire is the only thing standing between you and your teeth shifting back to their old, crooked ways. Have you ever felt like your retainer was more of a burden than a benefit?
The Night I Almost Tore My Gums Apart
Early on, I made the classic rookie mistake: I thought I could just force the floss between the contact points like I used to. Big mistake. I ended up with puffy gums and a lot of resentment toward my orthodontic hardware. I did not realize that a permanent retainer requires a bit of finesse, much like learning how to clean under a dental bridge without losing your mind. You cannot just bully your way through the metal. According to the American Association of Orthodontists, failing to maintain the area around a fixed retainer can lead to rapid tartar buildup in as little as 48 hours, which ironically puts the very smile you worked so hard for at risk. I had to learn the hard way that the trick to flossing around permanent orthodontic retainers is not about physical strength; it is about the right tools and a little bit of neighborly patience.
Is This Little Metal Wire Actually Worth the Hype?
You might be wondering if you should just give up, have the wire removed, and switch to a removable tray. I get it. The temptation to skip flossing because it feels like a chore is incredibly real. But trust me, as someone who values cosmetic dentistry secrets to keep a smile bright, the permanent retainer is a silent hero. It does the heavy lifting while you sleep and eat, ensuring you do not need a second round of braces in five years. It is a small price to pay for permanent alignment.
Stop Fighting Your Retainer and Start Working Around It
The secret to comfort is not just trying harder with the same old string. It is about changing the geometry of how you approach your teeth. When I first started, I did not even know floss threaders or bridge aids existed. I was literally trying to poke floppy string through a microscopic gap. It is one of those family dentistry tips that sounds so simple but changes everything once you actually put it into practice. We are going to dive into the specific tools and hand positions that make this a thirty-second task instead of a ten-minute ordeal that leaves you reaching for the ibuprofen.
Stop Fighting the Wire with the Wrong Gear
You wouldn’t try to change a tire with a screwdriver, so why tackle a permanent retainer with just a piece of slippery string? The first thing you need is a floss threader. It’s a simple, stiff loop of plastic that acts like a needle for your floss. I remember one Tuesday night before a big presentation; I was exhausted and tried to just jam the floss through the contact point above the wire. I ended up snapping the string and bruising my gum so badly it throbbed for an hour. That was the last time I skipped using a threader. Using the right tool is one of those the trick to flossing around permanent orthodontic retainers that makes the difference between a clean mouth and a bloody one.
Thread the Needle to Get Under the Metal
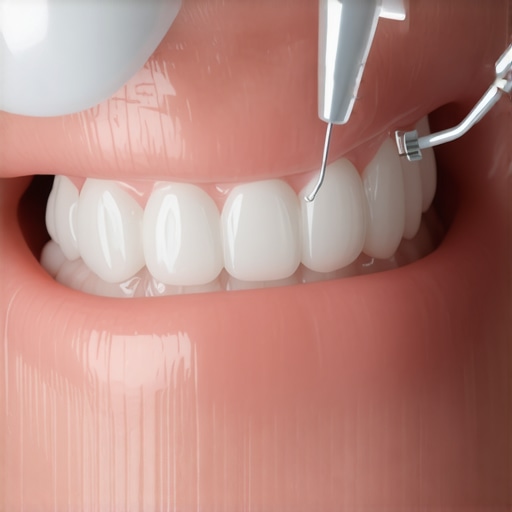
Once you have your threader, loop about 18 inches of floss through it. You want enough slack so you aren’t struggling to hold onto the ends. Aim the stiff tip of the threader into the gap between your teeth, specifically below the retainer wire but above the gum line. It’s a lot like learning how to clean under a dental bridge without shredding your floss; you have to find that sweet spot where the plastic slides through without resistance. Gently pull the threader all the way through until the floss is sitting comfortably under the wire.
Hug the Tooth to Reach the Hidden Plaque
Now that the floss is under the wire, don’t just pull it back and forth like a saw. You need to perform the ‘C-shape’ maneuver. Wrap the floss around the side of one tooth, creating a ‘C’ that hugs the enamel. Slide it up and down, making sure to go slightly below the gum line. This is one of those family dentistry tips that applies to everyone, but it’s critical here because plaque loves to hide right where the wire meets the tooth. Then, repeat on the other side of the gap before pulling the floss out and moving to the next tooth. If you skip this, you might eventually need to know how to tell if your dental bridge is trapped with food because a cavity could form under the retainer, leading to much more expensive work.
Consider the High-Tech Shortcuts That Save Time
If the manual threading feels like a Herculean task every night, you might want to look into a water flosser. It uses a pressurized stream of water to blast away debris from behind the wire. While it doesn’t replace the physical scraping of traditional floss entirely, it is a lifesaver on nights when you are too exhausted to be precise. Superfloss is another fantastic option; it comes with a built-in stiff end and a spongy middle section. The spongy part is incredible for wiping away the biofilm that builds up on the backside of the retainer wire itself. I started using this after I noticed a tiny bit of yellowing on the back of my lower front teeth. It turns out, regular string was just sliding over the wire, while the spongy texture of Superfloss actually grabbed the grime. Also, make sure you know how to pick a toothbrush that wont destroy your enamel, as aggressive brushing combined with trapped plaque can lead to serious sensitivity near your retainer sites.
The biggest lie I ever believed about high-end dental work was that it made my teeth ‘invincible.’ Most people assume that once they invest in a permanent solution, the hard part is over. In reality, the maintenance phase is where the real work begins. Everyone says that a dental implant is a ‘forever’ fix, but in my experience, the surrounding biology is what actually determines the timeline. If you stop flossing because you think ‘titanium can’t rot,’ you are falling for a dangerous trap. While the implant itself won’t get a cavity, the bone and gums supporting it are very much alive and vulnerable to infection. I have seen people lose thousands of dollars because they ignored the truth about the lifespan of a dental implant. You have to treat these restorations with more care than your natural teeth, not less.
Why do some veneers look like fake plastic while others look real?
The secret to a high-end smile isn’t just the price tag; it is all about the translucency and how the light interacts with the material. I once saw a friend get a full set of veneers that looked like white piano keys. They were perfectly straight, but they lacked any ‘depth’ or character. This usually happens when the porcelain is too thick or the shade is chosen in an unnaturally opaque vacuum. It is one of the most common mistakes in cosmetic dentistry secrets to boost your confidence—choosing the whitest white possible instead of a shade that mimics how light passes through natural enamel. If you aren’t careful, you might end up wondering why your veneers look too opaque and how to make them look natural. Here is a critical warning for anyone considering this: always verify the bond. I have heard horror stories of people whose restorations popped off during a dinner party because the underlying enamel was not prepared with the right acidity or moisture control. You need to know how to tell if your veneers were bonded correctly to the enamel before you leave that chair. A landmark study in the Journal of Oral Rehabilitation highlights that the long-term ‘survival rate’ of these restorations drops significantly when patients neglect the soft tissue hygiene. This is not just about the teeth; it is about the living foundation. Many people also struggle with their speech initially; if the lab makes the porcelain too thick, you will find out quickly why your veneers feel thick and bulky when you try to say the letter s. Even in the broader context of family dentistry tips for a lifetime of healthy smiles, the ‘hidden nuance’ is consistency over intensity. You do not need to scrub your gums until they are raw; you need to understand the unique biology of your specific restorations. For example, if you have an implant that feels slightly ‘off’ or vibrates when you chew, do not wait. You might need to learn how to save a dental implant that feels slightly mobile before it becomes a total failure. Have you ever fallen into this trap of thinking your dental work was maintenance-free? Let me know in the comments.I definitely did. But once I realized that my veneers and implants were like a high-performance sports car, I changed my tune completely. You wouldn’t buy a Ferrari and then never change the oil, right? Your dental work is exactly the same. To keep everything functioning, I had to upgrade my toolkit from a basic manual brush to something with more precision. I personally use a sonic toothbrush with a built-in pressure sensor. This is a game-changer because it physically stops the vibration if I press too hard. If you have been wondering why your gums are receding even though you brush twice a day, it is often because you are being too aggressive with your hand movements. The sonic tech does the work for you, gently breaking up biofilm without chewing through your gum tissue.
The Daily Kit I Swear By
Beyond the brush, my ‘holy grail’ tool is the interdental brush. These look like tiny pipe cleaners and are far superior to standard floss for cleaning the ‘cradles’ of your gums where implants and veneers meet. I use them every single night to ensure no food particles are sitting against the bond. This is one of the most effective 3 secrets to making your porcelain veneers last twenty years because it prevents the margin of the tooth from decaying. I also suggest a non-abrasive toothpaste with a low Relative Dentin Abrasivity (RDA) score. Many whitening pastes are essentially liquid sandpaper, which can dull the polish of your porcelain over time. 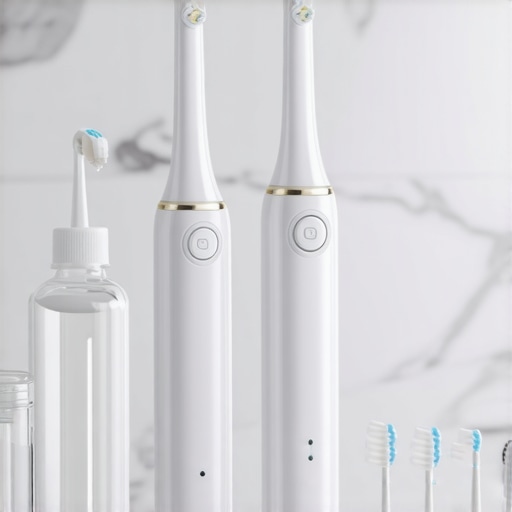
How do I maintain these high-end results over time?
Consistency is the boring but honest answer. It is about the the real cost of skipping your six-month checkup; professional cleanings use specialized ultrasonic tips that are safe for titanium and porcelain, something you just can’t do at home. According to a 2023 study published in the Journal of Periodontology, ‘mechanical plaque control remains the gold standard for preventing peri-implant diseases, but the addition of air-polishing and professional maintenance at 3-month intervals significantly reduces the risk of implant failure.’ If you are serious about your investment, you need that professional oversight. It’s part of the broader family dentistry tips for a lifetime of healthy smiles—it’s easier to prevent a problem than to fix a broken restoration.
Why AI Might Be Your Next Dental Hygienist
Looking ahead, the next decade is going to be wild for dental maintenance. I suspect we will soon see ‘smart’ retainers and implants embedded with microscopic sensors that can alert your phone if they detect early signs of inflammation or bacterial shifts. We are already seeing the future of dental implants cutting edge techniques in cosmetic dentistry moving toward bio-active materials that actually help the bone regrow around the hardware. The tech is moving from ‘passive’ pieces of metal and ceramic to ‘active’ biological participants in your mouth. If you want to start mastering your routine today, go buy a pack of interdental brushes tonight—your gums will thank you by tomorrow morning.
The Hardest Lesson I Learned While Protecting My Investment
If there is one thing I could go back and tell my younger self, it is that the day your braces come off isn’t the finish line—it is the start of a new chapter in cosmetic dentistry secrets to boost your confidence. I spent years thinking the wire was the problem, but the real issue was my mindset. I had to realize that maintenance is not a chore; it is an insurance policy for my smile. One of the biggest ‘lightbulb moments’ for me was discovering that even the most expensive dental work is only as good as the gum health supporting it. If you neglect the foundation, even the best work can fail, which is why understanding the truth about the lifespan of a dental implant is so vital. It’s about respect for the process and the results you’ve achieved. You aren’t just fighting plaque; you are protecting your future self from unnecessary pain and expense.
Build Your Personal Dental Defense Kit
To make this journey easier, I’ve narrowed down the tools that actually make a difference in my daily routine. First, a high-quality water flosser is non-negotiable for those high-pressure days when manual threading feels like too much. Second, always keep a stash of interdental brushes in your travel bag; they are the most effective way to prevent plaque from hardening into tartar around your retainer. Third, I highly recommend checking out 3 secrets to making your porcelain veneers last twenty years to understand how your product choices impact your hardware. Finally, never underestimate a simple mirror with a magnifying side—it helps you see the spots you’re missing before they become problems. #IMAGE_PLACEHOLDER_E#
Your Smile is a Lifelong Journey
Don’t let the initial frustration of a permanent retainer or new veneers discourage you. The learning curve is real, but it is short. Soon, these habits will become as second nature as tying your shoes. By integrating these family dentistry tips for a lifetime of healthy smiles, you aren’t just cleaning teeth; you are preserving your confidence and your health for decades to come. You’ve done the hard work of getting the smile you want—now, let’s make sure you keep it. If you ever feel stuck or notice something feels off, don’t hesitate to contact us for professional guidance. Have you found a specific tool or trick that made flossing your retainer easier? Let me know in the comments below!