I sat on my bathroom floor at 2 AM, tears blurring my vision, trying to figure out how something as tiny as a metal bracket could feel like a jagged razor blade against my cheek. I had just started my orthodontic journey, and while I was excited about the future, the present felt like a constant battle between my soft tissues and my new hardware. If you are currently staring at your reflection wondering if you can just ‘un-do’ the last forty-eight hours, I hear you. The good news is that your mouth is an incredible healer, and you don’t have to just suffer through it. Today, I am going to show you exactly how to toughen up those cheeks and soothe the fire so you can actually enjoy your day again.
Why Your Cheeks Feel Like They Are in a Boxing Match
It is not just in your head—the inside of your mouth is some of the most sensitive skin on your body. When you introduce orthodontic brackets, your mucosa (that soft inner lining) isn’t used to the friction. This friction creates small ulcers or ‘canker sores’ that can make talking or eating feel like a chore. I remember the first week I had mine; the reason your braces are making your cheeks feel raw became very obvious the moment I tried to eat a crunchy taco. My biggest mistake early on? I tried to ‘dry’ my gums with a rough paper towel before applying wax, which only irritated the area further. According to the American Association of Orthodontists, it typically takes about one to two weeks for your mouth to develop the necessary callouses to stop the irritation, but you need a survival strategy for those first fourteen days. You should also be prepared for similar sensations later on, so learning how to manage gum pain after getting your braces tightened is a skill you will use throughout your entire treatment.
Is this constant poking actually worth the hype?
You might be asking yourself if a straighter smile is worth this level of discomfort. I promise it is. The initial ‘break-in’ period is the hardest part. Once you master the art of wax application and salt water rinses, the soreness becomes a distant memory. In fact, many people find that choosing the right foods when braces are first put on makes a massive difference in how often those brackets catch on your skin. Have you ever felt like you were losing the battle with a specific sharp wire or bracket? Let me know in the comments because I have probably been there too. We are in this together, and the discomfort is just a temporary hurdle on the way to a life-changing smile. Knowing how to handle a loose orthodontic bracket is also crucial, as a moving piece of metal causes significantly more sores than a stable one.To stop the bleeding and the constant stinging, you have to create a physical barrier. Think of your dental wax as a tiny, customizable cushion for your teeth. When I first tried using it, I made the mistake of grabbing a giant glob of wax and shoving it over three teeth at once. It fell out within minutes because it was too heavy. The trick is to pinch off a piece no larger than a pea. You have to roll it between your clean fingers for about ten seconds to warm it up—this makes it sticky and pliable. Most importantly, you need to dry the bracket first. Use a Q-tip or a quick puff of air to remove all saliva. If the bracket is wet, the wax will slide around like a hockey puck on ice. Once it is pressed firmly into the nooks and crannies of the bracket, it creates a smooth surface that allows your cheek to glide over the metal instead of catching on it. This is surprisingly similar to how to treat a sore spot caused by your new dentures, where creating a relief zone is the absolute priority for healing soft tissues. 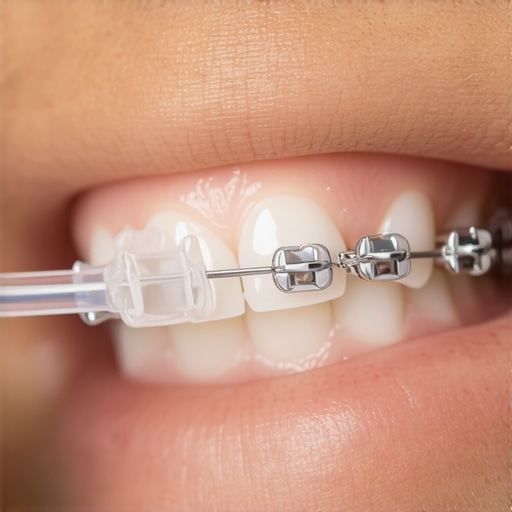
Speed Up the Healing with a Simple Salt Water Flush
While the wax prevents new cuts, you need to heal the ones you already have. Warm salt water is the gold standard for oral healing. It acts as a mild antiseptic and draws out fluid from swollen tissues, which reduces that ‘bulky’ feeling in your mouth. I used to do this three times a day during my first week of treatment. Dissolve about half a teaspoon of salt in eight ounces of warm water and swish gently for thirty seconds. It might sting for a brief moment, but the relief afterward is noticeable. This simple habit is one of those foundational family dentistry tips for a lifetime of healthy smiles that applies whether you have braces, a new crown, or just a bitten tongue from eating too fast. I remember one Tuesday night, about four days into my treatment, I was so frustrated that I almost tried to file down the bracket myself. Don’t do that. Instead, I sat down, forced myself to breathe, and spent five minutes perfectly drying my molar with a gauze pad before applying a fresh, warm bead of wax. That one piece stayed on for twelve hours, and by the next morning, the angry red ulcer on my cheek had finally started to shrink.
Check Your Hardware for Sharp Surprises
Sometimes the pain isn’t just from the ‘newness’ of the braces; it is a mechanical failure. Run your clean finger along your gum line to feel for anything out of the ordinary. Do you feel a thin wire poking out the back of your last molar? Is there a small metal door on a bracket that has popped open? A poking wire is like a needle in a haystack—it will find your softest tissue every time you smile. If you find a wire that is out of place, you can often use the eraser end of a pencil to gently tuck it back toward the tooth and away from your cheek. However, if a bracket feels like it is sliding or rotating, you are likely dealing with a failure in the adhesive. Knowing how to handle a loose orthodontic bracket can save you from a week of unnecessary misery and extra sores.
When to Adjust Your Expectations
Your mouth is a fast learner, but it isn’t magic. You have to give the callouses time to form, usually about ten to fourteen days. In the meantime, focus on your comfort levels. If the pain is coming from the pressure on the roots rather than the brackets rubbing on your cheeks, you are moving into a different territory of orthodontic care. Learning how to manage gum pain after getting your braces tightened is vital because that deep, pulsing ache requires different tools—like cold compresses or soft foods—than the surface-level scratches from metal. Some people even consider different paths for aesthetic corrections, such as veneers vs crowns, specifically because those treatments often involve less long-term hardware friction than traditional braces. But if you are in the braces game now, stay the course. The ‘toughness’ you are building today is what makes that final, straight smile possible.Once you get past the initial ‘break-in’ period of orthodontic hardware, it is easy to think you have cleared the biggest hurdle in your dental journey. However, the real expertise lies in understanding that a healthy smile is not just about moving teeth—it is about the harmony between bone, tissue, and restoration. Many people assume that once the braces come off, or once they get a ‘quick fix’ like veneers, the work is done. In my experience, the opposite is true. The most common mistake I see is the ‘set it and forget it’ mentality. If you are considering transitioning from braces to more permanent aesthetic upgrades, you need to understand that cosmetic dentistry is as much about structural engineering as it is about art. When you are weighing [veneers vs crowns](https://straightsmileortho.com/veneers-vs-crowns-choosing-the-best-option-for-your-smile), you aren’t just picking a look; you are choosing how much natural tooth structure you are willing to sacrifice for a specific outcome.
Why ‘Bleach White’ Usually Backfires
Everyone wants a bright smile, but the biggest ‘trap’ in the industry is the pursuit of a shade that doesn’t exist in nature. I have seen countless patients demand the whitest shade on the guide, only to realize later that [their porcelain veneers look opaque and not natural](https://straightsmileortho.com/why-your-porcelain-veneers-look-opaque-and-not-natural) because they lack the translucency of real enamel. Natural teeth have a gradient—they are slightly more saturated near the gum line and more transparent at the biting edge. If you go too far, you end up with [the mistake that makes your teeth look too white and fake](https://straightsmileortho.com/the-mistake-that-makes-your-teeth-look-too-white-and-fake), which actually draws more negative attention than a slightly dimmer, natural-looking smile. According to the Journal of Oral Rehabilitation, the most successful cosmetic outcomes are those that respect the ‘biological width’—the specific distance between the edge of your restoration and the bone. If your dentist ignores this to give you a ‘perfect’ look, your gums will remain in a state of chronic inflammation. 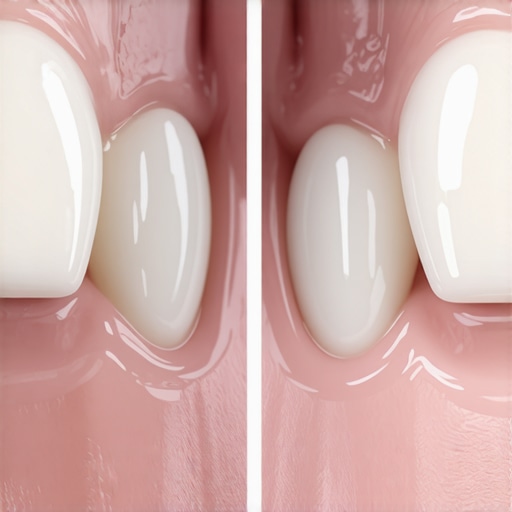
The Bone Loss Truth Most People Ignore
If you are looking at dental implants as a solution for a missing tooth, don’t let the marketing fool you into thinking it’s a simple plug-and-play procedure. A major nuance often overlooked is the quality of your alveolar bone. Many patients are surprised to learn that [the truth about the lifespan of a dental implant](https://straightsmileortho.com/the-truth-about-the-lifespan-of-a-dental-implant) depends almost entirely on the environment it’s placed in, not just the quality of the titanium screw. If you have been missing a tooth for years, the bone in that area has likely resorbed. Trying to force an implant into a site with insufficient volume is a recipe for failure. This is why understanding [the truth about getting dental implants if you have existing bone loss](https://straightsmileortho.com/the-truth-about-getting-dental-implants-if-you-have-existing-bone-loss) is vital. You might need a bone graft first, which adds months to the timeline, but skipping this step is the ‘oops’ factor that leads to a wiggly implant down the road.
Can Your Jaw Handle an Immediate Load Implant?
Advanced patients often ask if they can get their new tooth on the same day as the extraction. While ‘teeth in a day’ is a popular marketing term, the reality is that only a small percentage of patients are truly candidates for immediate load implants. It requires a specific level of primary stability—measured in Newton-centimeters—that can only be determined during surgery. If the torque isn’t high enough, loading that implant early will prevent it from fusing with your bone. Real [cosmetic dentistry secrets to boost your confidence](https://straightsmileortho.com/cosmetic-dentistry-secrets-to-boost-your-confidence) involve patience and following [family dentistry tips for a lifetime of healthy smiles](https://straightsmileortho.com/family-dentistry-tips-for-a-lifetime-of-healthy-smiles) rather than looking for a shortcut. Have you ever fallen into the trap of wanting a quick dental fix only to realize it required more maintenance than you expected? Let me know in the comments. We are playing the long game here, and your future self will thank you for taking the time to do it right.
Your Standard Toothbrush Might Be Ruining Your Finish
When I first invested in my smile, I thought a standard electric toothbrush and some whitening paste were all I needed. I was wrong. If you have porcelain work, those abrasive ‘whitening’ pastes act like sandpaper on the glaze. I personally switched to a non-abrasive gel with a relative dentin abrasivity (RDA) score below 70. This is one of those family dentistry tips for a lifetime of healthy smiles that people often overlook until they notice their restorations losing their luster. For my dental implants, I don’t just floss; I use a Waterpik WP-660 with the ‘Plaque Seeker’ tip. Why? Because the seal between an implant and your gum—the perimucosal seal—is far more fragile than the attachment on a natural tooth. According to the Misch International Implant Institute, mechanical cleaning must be meticulous but non-traumatic to prevent peri-implantitis. If you are curious about how these systems are evolving, looking into dental implants 2025 innovations that redefine comfort and durability will show you how hardware is becoming even more resistant to bacteria.
How do I keep my dental work looking brand new for decades?
The secret isn’t just cleaning; it is protection from your own jaw. I learned the hard way that stress shows up in your mouth first. I used to wake up with a dull ache, and it wasn’t until my dentist showed me the microscopic ‘craze lines’ in my veneers that I realized I was grinding my teeth at night. You absolutely cannot afford the risk of skipping your night guard for just one week. A single night of heavy bruxing can exert over 200 pounds of pressure per square inch, which is enough to shear the porcelain right off the bonding agent. Beyond the physical protection, I also maintain my shade by using a straw for my morning Earl Grey. It sounds small, but the secret to keeping your smile white without giving up your morning tea really comes down to limiting the contact time between chromogens and your teeth. 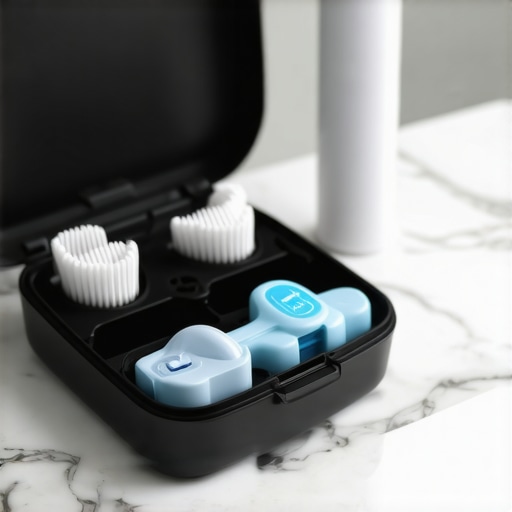
The Future of Your Smile is Getting High-Tech
I predict that by the end of this decade, we won’t be guessing about our oral health between six-month checkups. We are already seeing the rise of AI-integrated ‘smart’ retainers and implants that can monitor pH levels in your saliva to alert you of a potential infection before you ever feel pain. This level of preventative tech is exactly how dental implants reshape your oral health in 2025 and beyond, moving us from a ‘fix it when it breaks’ model to a constant state of optimization. If you are still on the fence about a procedure, check out a veneers transformation unlocking your best smile yet to see how digital smile design (DSD) now allows you to ‘test drive’ your teeth before the first bit of prep work even begins. My advanced tip for you today? Go buy a dedicated soft-pick kit and use it specifically around the margins of your dental work after every meal—don’t wait until the end of the day. Keeping those margins clean is the difference between a ten-year restoration and a forty-year one.
The Reality Check After Your First Big Appointment
One thing I learned the hard way is that your brain needs time to ‘re-map’ your mouth after any major change. Whether it is a new bracket or a full set of veneers, you will likely experience a phantom sensation where things feel ‘too big’ or ‘too smooth’ for a few days. If you have just graduated to an implant, you might notice the reason your dental implant feels different than a natural tooth is the lack of a periodontal ligament—it is a direct connection to the bone that lacks the ‘bounce’ of a real tooth. Don’t panic; this is normal. Also, remember that the initial discomfort of braces isn’t just physical—it is mental fatigue from managing the hardware. Give yourself grace during the first fortnight.
My Daily Toolkit for Restoration Longevity
I do not leave my dental health to chance anymore, and I recommend you do not either. To keep everything pristine, I rely on a high-quality water flosser and interdental picks that can reach under bridges and around brackets without snagging. If you are looking for transform your smile with veneers expert tips for perfect results, you must avoid the trend of abrasive DIY hacks. I have seen too many people scratch their expensive porcelain because they did not know the truth about whitening your teeth with activated charcoal—it is often way too gritty for dental work. Stick to pH-balanced rinses and non-abrasive pastes to ensure your investment does not lose its shine prematurely.
Your New Smile Starts with Today’s Habits
The journey from sore cheeks to a flawless reflection is not a sprint; it is a series of small, intentional choices. Every time you choose to wear your night guard or opt for a straw to protect your enamel, you are voting for the future version of your smile. These cosmetic dentistry secrets to boost your confidence are not about vanity; they are about the power of feeling comfortable in your own skin. You have the tools, the knowledge, and the resilience to handle the ‘break-in’ period. What was the most unexpected thing you noticed during your first week with new braces or dental work? Let me know in the comments below!