I sat at my kitchen table with a clock ticking loudly in the background, nursing a face that felt three sizes too big. My stomach was absolutely roaring. I’d just come home from the dentist after a tooth extraction, and the only thing I could think about was a slice of leftover pizza. But as I looked at the box on the counter, a wave of pure anxiety hit me. What if I dislodged the clot? What if I ended up with that legendary, soul-crushing pain people talk about? I’ve spent years navigating the world of family dentistry tips for a lifetime of healthy smiles, yet there I was, frantically googling whether a piece of bread could ruin my life.
Stop Staring at the Fridge and Read This First
We’ve all been there. You’re hungry, you’re cranky from the local anesthetic wearing off, and you just want a bit of normalcy. It is a vulnerable moment. Today, I’m going to walk you through the actual timeline of when it’s safe to eat, what foods are going to ruin your recovery, and how to avoid the “dry socket” nightmare. We aren’t just talking about avoiding crunchy chips; we are talking about protecting your long-term oral health. Whether you are recovering from a simple pull or preparing for how dental implants reshape your oral health, the first few hours are the most critical.
Is waiting 24 hours really necessary or just dental overkill?
You might think your dentist is being overly cautious when they give you that list of restrictions. I used to think that too. In fact, back when I was younger and a bit more reckless, I tried to “power through” and eat a toasted sandwich just four hours after a procedure because I thought I was a fast healer. I ended up having to manage the intense pain of a dry socket at home until the clinic opened the next morning. It was a miserable lesson in patience. According to the American Association of Oral and Maxillofacial Surgeons, the first 24 hours are the most critical for clot formation; even slight suction from a straw or the pressure of a solid morsel can disrupt the healing process entirely. If you’re dealing with a little one, finding the best snacks for kids who just had a cavity filled is one thing, but an extraction is a whole different ballgame. It’s not just about the tooth; it’s about the bone and the soft tissue working overtime to patch you back together.
Your 24-Hour Roadmap to Solid Food
The golden rule I live by now? Wait until the numbness is completely gone. If you try to chew while your lip is still “asleep,” you’ll likely bite your cheek so hard you’ll need another appointment just for that. Plus, temperature is your biggest enemy. I once made the mistake of drinking piping hot coffee while I was still numb—I couldn’t feel the burn until the blister formed. Trust me, you don’t want to be in a position where you have to keep your child from biting their lip after freezing while also nursing your own self-inflicted wounds. Have you ever tried to sneak a snack too early and regretted it immediately? I’d love to hear your story. Let’s dive into the specifics of what your plate should look like for the next three days so you can heal without the drama.
Stick to Lukewarm Liquids for the First Full Day
The moment you leave the office, your only job is to be a professional rester. Think of the extraction site as a tiny, fresh construction zone that hasn’t even set the concrete yet. For the first 24 hours, you are strictly on a liquid diet. But here is the catch: it cannot be hot. Heat causes blood vessels to dilate, which can kickstart bleeding all over again. I learned this the hard way after my first molar extraction. I thought a bowl of lukewarm-ish tomato soup would be fine, but the steam alone was enough to make my jaw throb. Now, I suggest high-protein shakes or Greek yogurt that has been sitting out for ten minutes to take the chill off. The goal is to keep your energy up without making your heart pump harder in your mouth. Learning the truth about getting dental implants if you have existing bone loss taught me that the foundation of your jaw relies heavily on how well this initial hole heals. If you mess up the clot now, you are potentially compromising future procedures like the future of dental implants cutting edge techniques in cosmetic dentistry.
Ditch the Straw and the Spices
This is the most non-negotiable rule in oral surgery recovery. Using a straw creates suction, and suction is the enemy of the blood clot. It is like using a vacuum cleaner on a loose scab; it will pull the clot right out of the socket. You should also avoid anything spicy. Capsaicin—the stuff that makes peppers hot—is an irritant. If you have ever wondered why your tongue feels like its burning after eating spicy food, imagine that same sensation inside an open wound in your jawbone. It is an experience I would not wish on my worst enemy.
Graduate to Soft Foods That Actually Taste Good
Once you hit the 48-hour mark, you can start introducing more substance. The dietary restrictions are very similar to what to eat when your braces are first put on and your mouth is sore, but with the added danger of the open socket. During my second extraction, I thought I could handle mashed potatoes on day two. I didn’t realize there were tiny skins still in the mix. One got stuck right in the extraction site. I spent three hours panicking, trying to decide if I should rinse it out or leave it. The lesson? Puree everything until it is as smooth as silk. Think scrambled eggs (whisked heavily), mashed avocado, or overcooked pasta that you can practically swallow whole. 
How to Chew Without Using Your Whole Mouth
When you start eating solids, chew exclusively on the opposite side of the extraction. It sounds simple, but muscle memory is a powerful thing. You will find yourself subconsciously moving food toward the wound. I found that tilting my head slightly toward the “good” side while chewing helped gravity keep the food away from the danger zone. If you accidentally bite yourself while the numbness is still fading or while navigating this new way of chewing, you will need to know how to treat a cut on your tongue or cheek quickly to avoid introducing extra bacteria to the site.
Manage Your Oral Hygiene Without Touching the Site
You still have to brush your teeth, but you need to be a surgeon with that toothbrush. Avoid the extraction site entirely for the first few days. Instead of spitting—which also creates suction—let the toothpaste and water just fall out of your mouth into the sink. It’s messy, but it’s safe. On day three, you can start gentle warm salt water rinses. Again, do not swish aggressively. Tilt your head from side to side to let the water move. Check your healing daily in the mirror. If you notice a weird bump on your gum is a fistula or see yellow discharge, that is your signal to stop the home care and call the office immediately. Keeping the rest of your mouth clean is vital for family dentistry tips for a lifetime of healthy smiles, but for these few days, the extraction site is a protected sanctuary.Once that extraction site finally heals, many of us start dreaming about the “perfect” replacement. But here is where most people—and even some general practitioners—trip up. There is a common belief that once you get a dental implant, your days of worrying about that tooth are over. I’ve seen people treat their implants like they’re made of indestructible vibranium. While it is true the implant itself cannot get a cavity, the tissue surrounding it is actually more vulnerable to specific types of infection than a natural tooth. This is the “oops” factor that leads to thousands of failed procedures every year. If you aren’t meticulous with your hygiene, you can develop peri-implantitis, a condition that mimics gum disease but acts significantly faster. According to a landmark study in the Journal of Periodontology, nearly 25% of patients develop some form of inflammatory response around their implants within the first few years. If you think you can skip flossing just because the tooth is “fake,” you are heading for a very expensive disappointment. This is a core part of family dentistry tips for a lifetime of healthy smiles that often gets glossed over in the excitement of a new smile.
Why Titanium Doesn’t Make You Invulnerable
Many patients assume that because the root is metal, it is permanent. In my experience, the longevity of an implant is less about the titanium and more about the environment you keep it in. Have you ever fallen into this trap? Let me know in the comments.
Why do most patients ignore the foundation before the finish line?
I often hear people ask if they can just “skip” the bone graft. They see the extra cost or the extra healing time and think it is an upsell. It isn’t. Trying to seat an implant in thin bone is like trying to build a skyscraper on a swamp. You might be told you are a candidate for immediate load implants if you have the density, but for the rest of us, the reason your dental implant surgery requires a bone graft is purely structural. Without that solid base, the implant won’t integrate, and you will be back in the chair before the year is out. 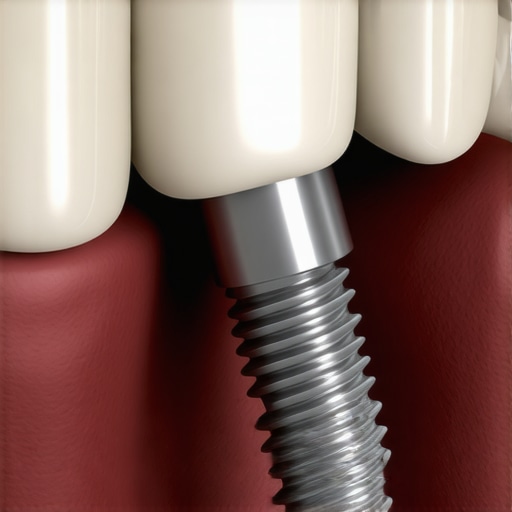
Don’t Fall for the Hollywood White Trap
Then there is the aesthetic trap. I’ve talked to so many people who walk in demanding the whitest shade on the chart for their veneers transformation. They want that blinding glow. But here is the nuance: real teeth have natural translucency. When you go for a solid, opaque “Toilet Seat White,” you fall into the mistake that makes your teeth look too white and fake. It actually draws attention to the work in a negative way. A truly skilled cosmetic dentist will talk to you about “characterization”—adding those tiny, nearly invisible imperfections that make the teeth look like they actually belong to your face. I also see people rush into veneers when they actually need structural support. Understanding veneers vs crowns: choosing the best option for your smile is about more than just looks; it’s about how much healthy tooth structure you have left. If you put a thin veneer on a tooth that is already structurally compromised, you might find what to do when a veneer pops off during dinner becoming a regular part of your search history. The same applies to the “feel” of your new smile. If your bite isn’t mapped correctly, you will find why your veneers feel bulkier than your natural teeth is a constant source of jaw fatigue. We are all learning that the future of dental implants and cutting-edge techniques means nothing if we don’t respect the basics of biology first.Respecting biology isn’t just about the surgery day; it’s about the three thousand days that follow. I’ve realized that my bathroom counter needed a serious upgrade once I committed to my veneers transformation.
Stop scrubbing your veneers like they are kitchen tiles
If you’re using a standard whitening toothpaste on your new porcelain, you are essentially using sandpaper. I used to love that gritty feeling, but then I read a report in The International Journal of Periodontics & Restorative Dentistry which explains that maintaining a low-abrasive environment is critical for the glaze retention of ceramic restorations. If you wear down that glaze, you’ll find why your teeth look yellow despite using whitening toothpaste—the underlying material becomes porous and picks up stains. I now strictly use a toothpaste with an RDA (Relative Dentin Abrasivity) score of 50 or lower. It feels less ‘clean’ at first, but it saves the shine.
The one tool that keeps my dental implants from failing
I used to be a string-floss purist until I got an implant. String can actually fray against the metal components, leaving tiny fibers that trap bacteria. Now, I use a high-end water flosser with a specialized ‘Plaque Seeker’ tip. It is the secret to flossing when your teeth are tightly crowded or when you have hardware that makes manual flossing a nightmare. I also suggest a sonic toothbrush with a pressure sensor. If you push too hard, you’re not just cleaning; you’re causing the gum recession we talked about earlier. 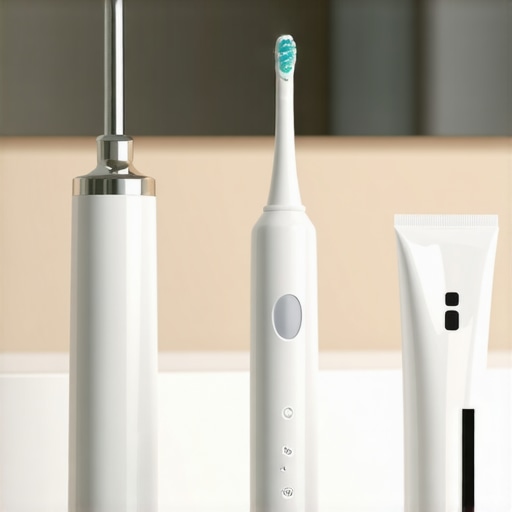
How do I maintain my dental work over time?
The biggest secret is consistency and the right protection. If you grind your teeth at night, that beautiful porcelain will eventually crack under the pressure. I learned how to clean your night guard without damaging the material because that little piece of plastic is the only thing standing between my investment and a total failure. You also need professional cleanings specifically tailored for implants—your hygienist should use plastic or titanium scales, never stainless steel, to avoid scratching the abutment.
The 2025 tech that will catch infections before they hurt
We are moving toward a world of ‘Smart Smiles.’ I’m already seeing pilots for AI-integrated intraoral cameras that you can use at home to sync with your dentist’s office. These tools look for the subtle color shifts of peri-implantitis long before you feel a throb. We are also seeing dental implants 2025 innovations that redefine comfort through bio-active surfaces that actually encourage bone growth. Between these and how dental implants reshape your oral health, we are entering an era where ‘false’ teeth are smarter than our originals. My advice? Grab a low-abrasive toothpaste tonight and stop the micro-scratching before it starts; your future self will thank you for the sparkle.
The Hardest Lessons I Learned on the Road to a Perfect Smile
After years of personal experience and professional guidance, I’ve realized that the dental chair is only the beginning. Here are the lightbulb moments that changed how I view recovery:
- The Clot is King: In the first 24 hours after an extraction, that tiny blood clot is your biological shield. Treat it like fragile glass to avoid the misery of a dry socket.
- Pain is a Signal Not a Requirement: If you feel sharp discomfort weeks into recovery, don’t just tough it out. Modern family dentistry tips for a lifetime of healthy smiles prioritize early intervention over endurance.
- Maintenance is Highly Selective: Not all cleaning tools are created equal. Using the wrong abrasive paste can turn a pristine restoration into a dull, scratched mess in months.
- Structure Always Beats Style: A veneers transformation only lasts if the teeth underneath are healthy and the bite is perfectly aligned.
My Essential Survival Kit for Modern Dental Care
I’ve curated a specific toolkit that actually works to keep results looking professional. First, I highly recommend a high-quality water flosser; it is the secret to flossing when your teeth are tightly crowded or when navigating new implants. Second, insist on advanced diagnostics for any major work. Understanding the reason your Culpeper dentist uses CBCT scans instead of regular x-rays will show you how much more precise your treatment plan can be. Third, use a toothpaste with an RDA score under 50 to protect your investment. Finally, keep the contact-us page of your provider handy—fast communication is the ultimate safety net during the first week of healing.
#IMAGE_PLACEHOLDER_E#
Take the Leap Toward the Confidence You Deserve
Investing in your oral health is one of the few decisions that pays dividends every time you look in the mirror or enjoy a meal with loved ones. Whether you are exploring cosmetic dentistry secrets to boost your confidence or managing a complex surgical recovery, remember that you are the most important part of the healing equation. Don’t let fear of the unknown hold you back from a functional, beautiful smile that makes you feel like the best version of yourself. Have you ever had a dental ‘aha!’ moment during recovery that changed the way you look at your toothbrush? Let me know in the comments below!