I will never forget the morning I looked in the bathroom mirror after a weekend of ‘careless’ coffee drinking with my trays still in. My smile didn’t look like the bright, professional result of cosmetic dentistry secrets; it looked like I had aged my teeth forty years in forty-eight hours. My clear aligners had taken on a murky, brownish-yellow hue that made me want to keep my mouth shut tight. In a total panic, I grabbed my firmest toothbrush and a massive dollop of whitening toothpaste. I scrubbed like my life depended on it. Huge mistake. Not only did the stain barely move, but I managed to scuff the plastic so badly that they looked permanently foggy and felt like sandpaper against my tongue. If you have ever had that sinking ‘oh no’ moment when you realize your expensive orthodontic investment looks like a science experiment gone wrong, I have been right there with you. Today, I am going to show you exactly how to get those trays back to being crystal clear without making the same abrasive blunders I did.
Stop Scrubbing Your Aligners with Abrasive Toothpaste
It is incredibly tempting to treat your aligners exactly like your natural teeth, but they are far more delicate than they appear. While you might be hunting for the secret to keeping your smile white, using those same whitening pastes on your trays is a recipe for disaster. I learned the hard way that clear plastic is surprisingly porous and incredibly prone to microscopic abrasions. When you use a gritty paste, you are essentially taking high-grit sandpaper to your smile. The American Association of Orthodontists warns that even tiny, invisible scratches can harbor bacteria that produce foul odors, making ‘clear’ aligners look dull and smell even worse. This damage is often irreversible. Once you have cloudiness from scratches, no amount of soaking will bring back that high-gloss finish. This is why what to do when your clear aligners stop fitting correctly often starts with how you have been maintaining the material itself. Have you ever noticed your trays getting cloudy or ‘fuzzy’ even after a thorough cleaning? That is usually the first sign of surface damage.
Will these gentle soaking methods actually work on deep stains?
You might be a bit skeptical right now. If a stiff brush and whitening paste didn’t get the job done, how is a gentle bath supposed to do anything? I was a total skeptic too. I thought I needed the ‘heavy hitters’ to get rid of a stubborn red wine or turmeric stain. However, the reality of clear plastic is that chemical reactions beat physical friction every single time. By using the right solutions, you can break down the pigments without compromising the integrity of the aligner. Stained trays are more than just a cosmetic annoyance; they can make your teeth look discolored in every social interaction, and why your teeth look different in photos with flash often comes down to the way light bounces off a dirty or scratched aligner. If you have ever felt the need to hide your smile in a group photo because of your trays, it is time to change your routine. Let us dive into the gentle techniques that actually work.
Keep the Heat Away from Your Plastic Trays
The biggest mistake most people make is trying to sanitize their aligners with boiling or even very hot water. Think of your aligners like a high-end smartphone case or even veneers transformation unlocking your best smile yet; they are precision-engineered to a specific shape. High heat causes the medical-grade plastic to reach its ‘glass transition temperature,’ which is a fancy way of saying they will warp and lose their memory. I remember one frantic Tuesday when I thought a quick dip in boiling water would kill the bacteria from a cold I had. When I tried to pop them back in, the upper tray felt like it belonged to a different person. If you ever find yourself in this situation, you need to know what to do when your clear aligners stop fitting correctly because a warped tray can actually move your teeth in the wrong direction, undoing months of progress.
The Lukewarm Vinegar Soak That Saves Your Trays
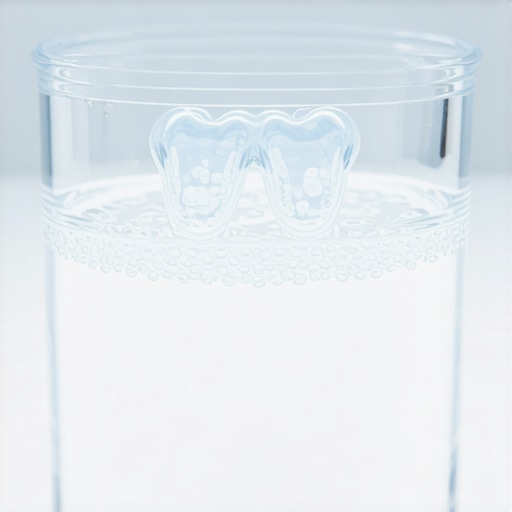
Instead of heat, rely on a 50/50 mixture of white distilled vinegar and lukewarm water. I use this method twice a week, and it is the only thing that managed to lift that stubborn ‘coffee haze’ I mentioned earlier. Submerge your trays for exactly fifteen minutes. The acidity of the vinegar breaks down the tartar and plaque buildup without eating away at the plastic itself. It is similar to how a dentist might explain how to clean under a dental bridge without shredding your floss; it is about reaching the areas friction cannot touch. After the soak, rinse them thoroughly with cool water to get rid of the salad-dressing smell. I once rushed this step before a first date and spent the whole night worrying my breath smelled like a pickle jar—don’t be like me, rinse twice!
Ditch the Stiff Bristles for a Baby Toothbrush
When you do need to physically remove a speck of debris, put down your standard toothbrush. Most adult brushes are far too stiff and will create those microscopic scratches that trap stains. I switched to a soft-bristled baby toothbrush, and the difference was night and day. It is gentle enough that it won’t scuff the surface, much like the care required for how to polish a scratched veneer at home without ruining the porcelain. Use a tiny drop of clear, liquid dish soap—not toothpaste. Dish soap is designed to cut through grease and biofilm without containing the abrasive silicas found in whitening pastes. If you are worried about chemicals, look for a ‘free and clear’ version. This keeps the trays so transparent that people won’t even notice you are wearing them, which is the whole point of cosmetic dentistry secrets to boost your confidence.
The Hydrogen Peroxide Trick for Stubborn Yellowing
If your trays have already started to turn that sickly shade of yellow, a quick bath in 3% hydrogen peroxide can be a lifesaver. This is a much safer alternative than trying to use whitening agents that aren’t designed for plastic. Mix one part peroxide with one part water and let them sit for thirty minutes. This oxygenating action lifts pigments out of the pores of the plastic. This is a far better approach than the ‘do-it-yourself’ trends that often backfire; for example, understanding the safest way to use charcoal for teeth whitening shows that many ‘natural’ remedies are actually too abrasive for dental work. After the peroxide soak, your trays will look noticeably brighter. This routine is essential for anyone following family dentistry tips for a lifetime of healthy smiles, as keeping your orthodontic hardware clean prevents gum inflammation and cavities during your treatment.
Beyond just keeping things clean, there is a nuance to high-end dental work that many people overlook until they see their reflection in harsh sunlight. We are often told that the goal of a veneers transformation unlocking your best smile yet is to get the whitest, most perfect set of teeth possible. But in my experience, chasing a ‘pure white’ shade is the fastest way to end up with a smile that looks like plastic. Natural teeth aren’t opaque; they have a certain level of translucency. When you opt for a flat, monochromatic white, you lose the depth that light provides. This is exactly why your veneers look like white chiclets and how to fix the texture. According to a study published in the Journal of Prosthetic Dentistry, the perceived ‘naturalness’ of a restoration depends more on how the material mimics the light-scattering properties of enamel than on the actual color. If you don’t account for this, your teeth might look great in the bathroom but weirdly ‘dead’ in photos.
Avoid the Trap of Ignoring the Gum Line
The ‘Oops’ factor that catches almost everyone off guard is what happens at the junction where your restoration meets your gums. Whether you have crowns, bridges, or how dental implants reshape your oral health in 2025, that transition zone is where most failures start. Many patients assume that since porcelain can’t get cavities, they can relax their hygiene. This is a dangerous myth. Bacteria still love to congregate where the porcelain meets the natural tooth or the implant abutment. If the gums recede even slightly because of poor hygiene, you’ll see a dark line or a gap. I have seen so many people invest thousands, only to wonder how to fix the gap that appeared between your gums and your new bridge six months later because they stopped flossing that specific area. This is a core part of family dentistry tips for a lifetime of healthy smiles—the hardware might be artificial, but the foundation is still living tissue.
How do light refraction and translucency affect my final result?
If you have ever noticed that your smile looks different depending on where you are, you are seeing the effects of metamerism. This is why your veneers look different in sunlight versus indoor lighting. A common mistake is choosing your shade in a room with fluorescent lights. Expert cosmetic dentists use ‘daylight’ balanced bulbs to ensure the porcelain reacts to light the same way your natural teeth do. If you skip this step, your front two teeth might look like they belong to someone else the moment you step outside. Have you ever fallen into this trap or noticed your dental work changing color in different rooms? Let me know in the comments below.
The Secret to Longevity Beyond the Surface
Finally, we need to talk about the physical forces at play. Most people think their veneers or the future of dental implants cutting edge techniques in cosmetic dentistry are invincible. They aren’t. In fact, porcelain is brittle. If you have a habit of clenching when stressed, you are putting immense pressure on those bonds. This is one of the 6 habits that cause your porcelain veneers to pop off unexpectedly. It is not just about what you eat; it is about the micro-movements of your jaw. If you want your investment to last, you have to treat the underlying cause of wear, or you will just be looking for how to fix a chipped veneer without replacing the whole unit every few years. True expertise in cosmetic dentistry is not just about the ‘reveal’; it is about the engineering required to keep that smile functional for decades.
If you have spent any time researching 3 secrets to making your porcelain veneers last twenty years, you know that physical protection is the real hurdle. Most people focus on the first week after the procedure, but the real work happens in the years that follow. I’ve found that the biggest threat isn’t a hard apple; it’s what you do while you’re asleep. This is why I consider a custom-fitted night guard to be the single most important insurance policy for your mouth. Even if you don’t think you grind your teeth, the risk of skipping your night guard for just one week can introduce micro-fractures in the porcelain that won’t show up for months. Dr. Gordon Christensen, a world-renowned expert and founder of the Clinicians Report, has noted that the failure of many modern restorations is often tied directly to unmanaged occlusal forces—basically, the way your teeth hit each other when you’re stressed.
Wear Your Night Guard Like Your Smile Depends on It
I didn’t believe I was a grinder until my dentist showed me the flat spots on my back molars. If you have veneers or crowns, that grinding force is magnified, and it can actually lead to the porcelain debonding or chipping. Protecting that bond is crucial, and part of that process is knowing how to tell if your veneers were bonded correctly to the enamel in the first place. If the initial fit is slightly off, the pressure from nighttime clenching will find that weak spot every time. I now treat my night guard as a mandatory part of my routine, right next to charging my phone. It keeps the jaw relaxed and ensures that the engineering of my smile stays intact while I’m not conscious to monitor it.
Invest in an Ultrasonic Cleaning Pod
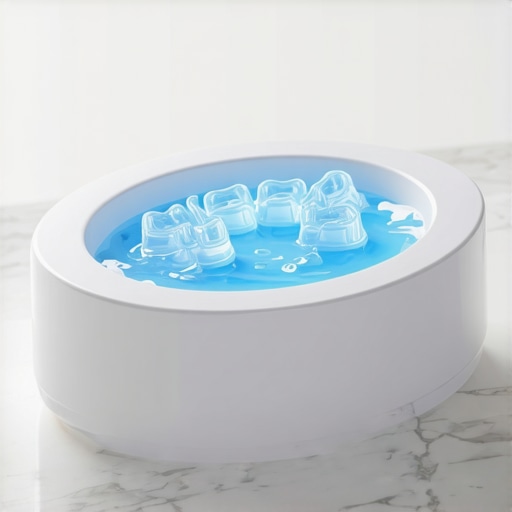
For those of you wearing clear aligners or retainers, manual scrubbing is officially old news. I’ve switched entirely to using a small ultrasonic cleaning pod. These devices use high-frequency sound waves to create millions of microscopic bubbles that implode against the surface of your trays, vibrating away biofilm and calcium deposits that a brush simply cannot reach. It is the same technology your dentist uses to clean instruments. By using this with a specialized cleaning tablet, you keep the plastic perfectly clear without the risk of scuffing. When you are learning how to pick a toothbrush that won’t destroy your enamel, you realize that less friction is almost always better for synthetic materials.
How do I maintain my complex dental work over time?
Maintenance is less about heroics and more about the boring, daily rituals. It involves using the right tools—like a high-quality water flosser and a non-abrasive gel—and never missing those professional cleanings. I’ve seen that the patients who have the most success are the ones who treat their dental work like a high-performance vehicle; you don’t wait for the engine to smoke before you change the oil. As we look toward the future, dental implants 2025 innovations that redefine comfort and durability suggest that we are entering an era of smart dentistry. We are already seeing the rise of AI-driven apps where you can scan your smile with your smartphone, and the software alerts you to any shifts or issues before they become visible to the naked eye. This proactive approach is going to be the standard for everyone within the next five years. My final piece of advice is to be incredibly picky about your maintenance products. I encourage you to try the dish soap and baby toothbrush method for your trays this week—it sounds simple, but the clarity you will regain is shocking.
A Few Hard Truths About Living with Dental Work
After years of navigating the ups and downs of clear aligners and professional dental work, I’ve realized that the ‘perfect’ smile isn’t a destination—it’s a daily maintenance plan. One of the biggest lightbulb moments was understanding that natural-looking teeth require translucency; if you push for a flat, artificial white, you might find why your veneers look too opaque and how to make them look natural becomes a frustrating reality.
I also learned that choosing the right procedure from the start saves a lot of heartache later, which is why weighing veneers vs crowns choosing the best option for your smile is a conversation every patient should have long before they sit in the chair. Finally, I realized that my gums are the foundation of everything; without healthy tissue, even the most expensive dental work will fail prematurely.
#IMAGE_PLACEHOLDER_E#
My Personal Arsenal for a Pristine Smile
To keep everything looking as fresh as the day it was installed, I rely on a few specific tools. First, an ultrasonic cleaning pod is non-negotiable for aligners—it gets into the microscopic crevices where a manual brush simply cannot reach. Second, I recommend pH-balanced, alcohol-free mouthwashes that prevent dryness and surface staining. Third, a custom night guard is the best insurance policy for your mouth. If you skip this, you might notice why your teeth look shorter after years of nighttime grinding as the porcelain starts to wear down. Lastly, I always keep distilled white vinegar on hand for a deep-cleaning soak once a week to remove mineral buildup.
Take the First Step Toward Permanent Clarity
Your smile is your calling card, and keeping it clear shouldn’t feel like a chore. By moving away from abrasive scrubbing and embracing these gentler, science-backed methods, you can protect your investment and your confidence for decades. The world of cosmetic dentistry is constantly evolving, and staying informed is the best way to ensure transform your smile with veneers expert tips for perfect results applies to your daily life. Remember, the goal is a smile that looks healthy, clear, and uniquely yours. What is the biggest challenge you have faced while trying to keep your trays or dental work looking like new? Let me know in the comments below.