I’ll never forget the first time I saw the professional photos from my sister’s wedding. There I was, grinning ear to ear in a candid shot taken with a heavy-duty flash, and my teeth looked… well, they looked like glowing neon blue cubes. I was horrified. In the mirror that morning, I thought my smile looked bright and healthy. But in that picture? I looked like I’d been chewing on glow sticks. If you’ve ever cringed at a photo because your smile looked gray, blue, or strangely opaque, I want you to know you aren’t alone. It’s a common frustration, and honestly, it’s rarely your teeth’s fault—it’s the way light interacts with them. Today, we’re going to solve the mystery of the “camera-shy” smile and look at how we can get you back to feeling confident whenever the shutter clicks.
The Night a Single Flash Ruined My Favorite Photo
We’ve all been there: the lighting in the room is dim, someone pulls out a camera, the flash fires, and suddenly you look like a different person. For me, that wedding photo was a wake-up call. I spent hours searching for answers about why your teeth look translucent at the edges, convinced I was losing my enamel or that I had some rare dental condition. I even made the classic mistake of buying every whitening strip I could find. I thought if I just made them whiter, the weird blue tint would go away. Spoiler alert: it actually made the translucency even more obvious under the flash because I was stripping away the very depth that gives teeth their natural color. This is one of those cosmetic dentistry secrets to boost your confidence: sometimes less is more when it comes to chemical whitening, especially when you are dealing with thin enamel.
Do my teeth actually look this weird in person?
This is the fear that keeps most of us from smiling in photos, isn’t it? You worry that the camera is revealing a secret truth your bathroom mirror is hiding. But here is the reality: your teeth are three-dimensional, semi-translucent structures. A camera flash is a massive, flat burst of light that hits your teeth and bounces back instantly. It doesn’t have the time or the angle to highlight the natural contours of your smile. According to the American Academy of Cosmetic Dentistry, natural teeth possess a property called fluorescence, meaning they absorb ultraviolet light and re-emit it as visible light. If your teeth have been heavily whitened or if you have older dental work, they might not react to that flash the way natural enamel does, leading to that flat or gray appearance that looks so jarring on a screen.
How Light and Enamel Create That Unwanted Glow
The reason why your veneers look different in sunlight versus indoor lighting is the same reason they might look off in a flash photo. Sunlight is full-spectrum and warm; a camera flash is often cool, blue-toned, and artificial. If you’ve ever felt like your porcelain veneers don’t match your natural teeth in pictures, it’s likely because the materials reflect that artificial light at different speeds. I remember feeling so frustrated that my front two teeth looked like bright white blocks while the rest looked normal. Have you ever faced this specific problem where one photo makes you want to book a dentist appointment immediately? It’s a jarring experience, but understanding the way light travels through porcelain versus natural bone is the first step to fixing the problem. We aren’t just looking for white teeth; we are looking for teeth that handle light gracefully, and sometimes that means checking why your veneers look too opaque and adjusting the material accordingly.
Pick materials that mimic the way light travels
To fix a smile that looks flat or blue in photos, you have to look at the anatomy of the restoration. Natural teeth aren’t one solid color; they are a sandwich of different densities. When I first started looking into veneers transformation unlocking your best smile yet, I didn’t realize that the best results come from layering. Imagine your tooth like a high-end camera lens—multiple layers of glass working together to handle light. If your dentist uses a single block of monochromatic porcelain, it will bounce light back like a mirror. You want a master ceramist who understands how to build depth from the inside out.
Why opacity is your biggest enemy in flash photography
The reason many people struggle with why your veneers look too opaque and how to make them look natural is that the technician tried to hide a dark underlying tooth with a blocker layer. This blocker is often too dense, making the tooth look like a piece of chalk when a camera flash hits it. When I had my own consultation, I brought in that horrific wedding photo. My dentist explained that we needed to balance the stump shade with a porcelain that has varying levels of translucency. This ensures that the light doesn’t just hit a wall and bounce back, but travels through the porcelain, hits the internal layers, and glows from within.
Strategic layering isn’t just for veneers
This concept applies to everything from a small filling to dental implants 2025 innovations that redefine comfort and durability. If you are replacing a tooth, the crown on top of that implant needs to match the light-refractive properties of your neighbors. I’ve seen cases where a single implant crown looked like a beacon of light in a dim restaurant because the porcelain didn’t have enough incisal translucency—that slightly clear edge we see in natural teeth. If you are debating between veneers vs crowns choosing the best option for your smile, remember that crowns offer more room for internal characterization, which can actually help hide those weird lighting effects better than thin veneers in some cases.
Stop the whitening cycle before you hit the blue zone
We often think more whitening equals a better photo, but there is a point of diminishing returns. Over-bleached teeth lose their organic warmth. This is one of the top family dentistry tips for a lifetime of healthy smiles: maintain a shade that matches the whites of your eyes, not the white of a piece of paper. When I over-whitened my teeth back in college, they started to look gray at the edges. This happened because I was stripping away the pigment but not changing the structure, making the edges of my teeth act like fiber-optic cables that sucked in the blue light from the environment. Knowing why your teeth look translucent at the edges helps you realize that sometimes you need to stop bleaching and start focusing on remineralizing or protecting that remaining enamel.
How to test your smile before the big event
If you have an upcoming wedding or photoshoot, do a flash test in a dark room. Take a selfie with a harsh, direct flash from about three feet away. If you notice why your porcelain veneers don’t match your natural teeth in that specific lighting, it’s a sign the texture or the internal color is off. You can often have a dentist micro-etch the surface of a restoration to change how it reflects light, or you might need to adjust your makeup to use warmer tones that counteract the cool blue of the camera flash. It sounds like a lot of work, but compared to a lifetime of hiding your smile in photos, it’s a small price to pay.Most patients assume that a perfectly smooth, glass-like surface is the ultimate goal for a beautiful smile. I’m here to tell you that’s a mistake. If a veneer or crown is too smooth, it acts like a mirror, reflecting a harsh, flat glare directly back at the camera lens instead of diffusing the light. This is exactly why your veneers look like white chiclets and how to fix the texture. You actually want a master ceramist to build in ‘micro-morphology’—tiny, almost invisible ridges and valleys that mimic natural enamel. A study published in the Journal of Esthetic and Restorative Dentistry confirms that surface texture is just as important as color for light scattering. Without these imperfections, your smile will always look ‘fake’ under a professional flash.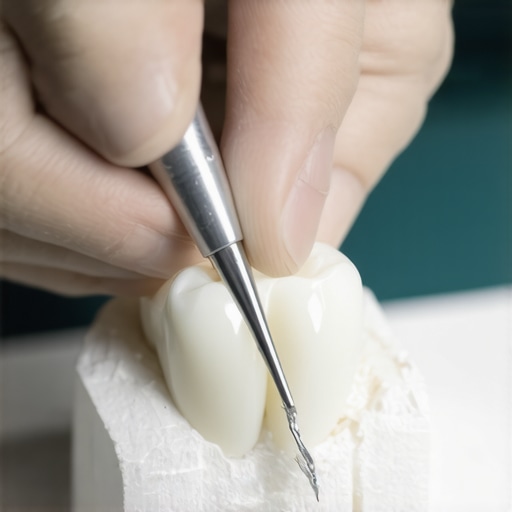
Ditch the mirror finish for a natural glow
The ‘Oops’ factor usually happens during the shade-matching phase. Most people make the mistake of picking a single, bright monochromatic shade for their entire tooth. But natural teeth have a gradient; they are more saturated and golden near the gum line and more translucent at the biting edge. When you are looking into the future of dental implants cutting edge techniques in cosmetic dentistry, look for providers who use multi-layered zirconia or porcelain. If you ignore this internal ‘story’ of the tooth, your restoration will look like it’s floating in your mouth rather than being part of your face.
Why does my brand new crown still catch the camera light differently?
The answer often lies in the refractive index of the materials. Natural enamel has a specific way of bending light that differs from metal-backed crowns. This is why if you are debating between veneers vs crowns which is right for your smile, you need to consider the core material. Metal-ceramic crowns often have an ‘opaque’ layer that stops light dead in its tracks, which is the primary cause of that gray shadow at the gum line in photos. Modern all-ceramic options allow light to pass through the restoration and reflect off the natural tooth structure underneath, creating a much warmer and more believable result. Even if you are dealing with more complex issues like the truth about why your dental implant feels loose, the aesthetic success still depends on how the final crown handles that light. Have you ever fallen into this trap of choosing the whitest shade possible only to regret it later? Let me know in the comments.Maintaining a complex smile transformation isn’t about working harder; it’s about working smarter with the right technology. Once you’ve achieved a veneers transformation unlocking your best smile yet, you have to realize that while porcelain is incredibly durable, the bond and the underlying tooth remain organic and vulnerable. I personally switched to an electric toothbrush with a built-in pressure sensor—specifically the Oral-B iO series—because I realized I was a chronic ‘scrubber.’ If you press too hard, you risk how to tell if your gum recession is caused by brushing too hard. These sensors turn red when you’re being too aggressive, which was the only way I finally learned to back off and let the micro-vibrations do the heavy lifting for me.
Stop scrubbing and start vibrating
Using a soft or extra-soft brush head is non-negotiable for anyone with cosmetic restorations. I recommend the ‘Sensitive’ or ‘Gentle Care’ heads because they don’t create micro-scratches on the porcelain glaze. 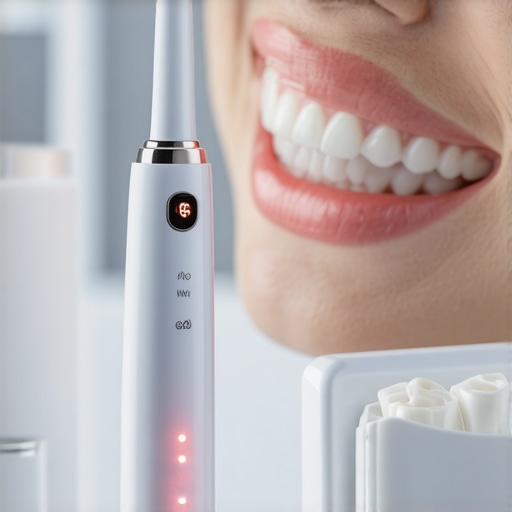 For anyone with a bridge or implants, traditional string floss can be a frustrating hurdle. I am a huge advocate for the Waterpik Aquarius. It is not just about the stream of water; it is about using the specific orthodontic or ‘Pik Pocket’ tips that get into those tiny crevices that regular floss simply skips. If you do not keep those junctions clean, you will eventually find out how to tell if your dental bridge is trapped with food you can’t see the hard way through inflammation or a real cause of that metallic taste in your mouth after surgery.
Flush away the hidden debris
A study published in the Journal of Prosthetic Dentistry found that the surface roughness of a restoration is the primary predictor of wear on your opposing natural teeth. This means that if you skip your professional polishing appointments, your high-end veneers could actually act like sandpaper on your lower teeth over time. This is why you need to know the 3 secrets to making your porcelain veneers last twenty years—it is not just about aesthetics; it is about mechanical harmony within your bite. I predict we are moving toward an era of ‘smart’ restorations. We are already seeing the future of dental implants cutting edge techniques in cosmetic dentistry where sensors can detect early bacterial changes in the biofilm. Within a decade, your crown might literally send a notification to your phone if it detects a pH shift that indicates potential decay underneath.
How do I keep this high-end smile working for decades?
It ultimately comes down to your family dentistry tips for a lifetime of healthy smiles. You have to treat your dental work like a luxury vehicle. You would never dream of skipping an oil change on a Ferrari, so do not ignore the real cost of skipping your six month checkup. If you have implants, ask your dentist specifically for a what your culpeper dentist sees on a cbct scan that a standard x-ray misses every few years to check the bone density around the post. This proactive approach ensures how dental implants reshape your oral health in 2025 remains a success story rather than a costly repair bill. Go grab a pressure-sensing toothbrush today; it is the single most effective way to stop yourself from literally brushing your investment away.
The Hardest Lesson I Learned About Camera-Ready Smiles
Looking back at that wedding photo, I realized that the biggest mistake wasn’t the lighting—it was my obsession with a ‘flat’ version of perfection. Teeth are light processors, not mirrors. One thing experts won’t always tell you is that a slightly warmer, more saturated shade often looks ‘whiter’ in a photo than a stark bleached shade because it maintains the internal glow. If you are going through a veneers transformation unlocking your best smile yet, don’t just look at the teeth in the dental chair; ask to see how they look in a hallway with natural light. My personal lightbulb moment came when I stopped chasing the brightest white and started chasing depth.
I also learned that your gums are the frame for your teeth. If you ignore them, even the most expensive cosmetic dentistry secrets to boost your confidence won’t save a photo where your frames look inflamed. Healthy tissue reflects light in a soft, pink way that complements the porcelain. If you’ve ever wondered why some smiles look ‘heavy’ in pictures, it is often because the transition between the tooth and the gum isn’t managed with artistic care. Always prioritize tissue health if you want that natural, youthful look when the flash hits.
My Daily Arsenal for a High-End Smile
I trust these specific tools because I’ve seen the damage that aggressive, unguided cleaning can do to a beautiful restoration. First, you need to know how to pick a toothbrush that won’t destroy your enamel or scratch your porcelain; a pressure-sensing electric brush is the gold standard. Second, I recommend a high-quality water flosser to keep the areas under bridges and around implants debris-free without the mechanical trauma of string floss. #IMAGE_PLACE_HOLDER_E# Finally, I always suggest keeping a ‘dental diary’ of photos—take a picture every few months in the same lighting so you can spot changes before they become expensive problems.
Stop Hiding and Start Flashing That Grin
Your smile is the most visible part of your personality, and you shouldn’t have to fear the flash of a camera. Whether you are following family dentistry tips for a lifetime of healthy smiles or are ready to dive into a complete overhaul, the goal is the same: confidence that feels as good as it looks. If you’re ready to take the next step and want professional eyes on your unique situation, don’t hesitate to contact us for a personalized plan. Your smile deserves to be seen in its best light. Have you ever seen a photo of yourself and immediately worried about how your teeth looked? Let me know your experience in the comments below!