I was standing in front of my bathroom mirror, face flushed and hands shaking, feeling like I had just lost a battle with a tiny piece of nylon. I had just finished a great steak dinner, and in my quest for a perfect smile, I managed to wedge a piece of waxy floss so deep between my molars that it snapped right off. The tail was gone. I was left with this maddening, phantom pressure that wouldn’t budge. In my early days of obsessing over oral health, I made a huge mistake: I once grabbed a pair of metal tweezers and tried to perform surgery on my own gums. I ended up with a bloody mess and a week of soreness that made me regret ever picking up the floss in the first place. Trust me, you do not want to go down that road. If you have ever felt that instant surge of regret when the thread breaks, you are not alone. Today, I am going to walk you through the gentle, neighborly ways to coax that stubborn string out without risking your enamel or your sanity. Whether you are dealing with veneers that feel tight or just naturally crowded teeth, there is a way out that does not involve pliers or a trip to the emergency room.
Stop Tugging and Start Thinking Before You Hurt Your Gums
The first rule of the Stuck Floss Club is to stop pulling vertically. When you pull up or down with brute force, you are likely just tightening the knot and shoving the fibers deeper into the sulcus—that is the little pocket of space between your tooth and gum. I have learned the hard way that patience is your best tool. According to the American Dental Association, using non-dental objects like needles, safety pins, or wood splinters to dislodge debris can lead to serious gingival trauma and even infection. We want a healthy smile, not a trip to the oral surgeon for a preventable mistake. If you have followed some of my other family dentistry tips, you know that the goal is always longevity and comfort. A single piece of stuck floss should not be the reason you end up needing cosmetic dentistry to fix a chipped tooth. Take a deep breath. We are going to use physics, not force. Have you ever been in this situation where you felt like your own bathroom was the scene of a minor medical emergency? Drop a comment and tell me what MacGyver tool you almost reached for!
Does This Tiny Piece of Thread Actually Require a Dentist
It is easy to spiral into thinking you will need a full extraction just to remove a half-inch of nylon. You might worry about the thread rotting or causing a massive abscess by morning. While it is certainly uncomfortable, it is rarely an immediate emergency if you handle it with a cool head. The secret to flossing comfortably, even when things go wrong, is knowing when to stop and try a different angle. We are going to look at the knot trick and the water pressure method, both of which have saved me from many late-night calls to my dentist. Before we dive into the step-by-step, let us look at why your teeth are being so stubborn in the first place and how we can prevent this waxy nightmare from ever happening again.
Slide the Thread Sideways Instead of Pulling Up
When you feel that resistance, your instinct is to yank the floss upward to clear the contact point between your teeth. This is exactly how you end up snapping the thread or, worse, irritating the delicate tissue. Think of your teeth like a tight doorway; if you try to force a bulky package through the top, it gets wedged. Instead, let go of one end of the floss and pull it horizontally through the side. I learned this the hard way after trying to muscle a piece of thick tape through a tight gap. I ended up with a sore jaw and a piece of floss that was even more buried. By simply letting go of one side and pulling the string toward your cheek, you bypass the tightest part of the tooth contact entirely. This technique is especially important if you have veneers that feel tight, as pulling vertically can put unnecessary stress on the bonding material. If the floss is too short to grab, move on to the mechanical hook method.
Create a Hook with the Double Knot Method
If the floss is stuck deep and you cannot get a grip on the ends, you need to send in a rescue mission. Take a fresh, long piece of floss—preferably a different type like a non-shredding PTFE tape—and tie a small, simple knot right in the middle. Guide this new piece into the same gap. Once the knot is just above the stuck fragment, gently move it back and forth. The knot acts like a tiny crochet hook, snagging the frayed ends of the broken floss and dragging them out as you pull. I once used this trick when a piece of spinach got caught under a dental bridge. It felt like I was fishing in my own mouth, but after three gentle passes, the knot caught the debris and pulled it clear without me having to poke around with a toothpick. This is often the best way to remove a stubborn spinach leaf or a frayed thread from tight spaces.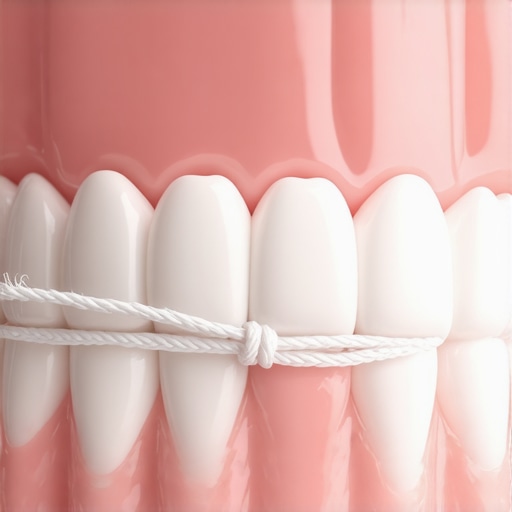
Blast the Gap with Targeted Water Pressure
If manual retrieval is not working, it is time to use hydro-power. A water flosser is your best friend here because it uses pulsating pressure to flush out the sulcus without touching the tooth surface. Set the device to a medium setting—too high and you might cause temporary gum bleeding, too low and it won’t move the thread. Aim the tip directly at the space between the teeth from both the front and the back. I have seen patients who thought they needed a professional cleaning just to remove a piece of waxy buildup, only to have it wash away in seconds with a steady stream of water. If you do not own a water flosser, a plastic oral syringe filled with warm salt water can provide enough directed pressure to do the job. This method is incredibly helpful for flossing comfortably with a permanent retainer, where threads frequently get snagged on the metal wire.
Use a Thick Waxed Thread for Extra Grip
Sometimes the issue is that the stuck floss is too slippery to catch. In these cases, using a thick, heavily waxed floss or even a bit of dental tape can provide the friction needed to move the stuck piece. The wax creates a ‘sticky’ surface that adheres to the broken fibers. When I was first learning about family dentistry tips, I realized that many people use the wrong type of floss for their specific tooth alignment. If you have crowded teeth or complex dental work, a thin thread might snap, while a waxed tape will glide. Gently guide the waxed tape into the gap, press it against the side of the tooth where the fragment is lodged, and perform that horizontal slide again. You are essentially using the new floss as a temporary adhesive to pull the old one out of the ‘danger zone’ near the gum line.While we have covered the immediate mechanical ways to rescue a broken thread, we need to dig deeper into why this happens—and why most people misunderstand the warnings their teeth are giving them. There is a common misconception in family dentistry that if floss keeps shredding, you just need a stronger brand. In my experience, if your floss is acting like it is being pulled through a cheese grater, you aren’t looking at a hygiene problem; you are looking at a structural red flag. Many patients assume that once they get restorations, those teeth are invincible. However, the nuance that even seasoned flossers miss is the integrity of the dental margin. This is the microscopic line where your natural tooth meets a veneer or crown. If this transition isn’t perfectly smooth, it becomes a literal trap for nylon fibers. One major oops factor to avoid is the urge to use aggressive flossing to smooth out a rough spot. I have seen people try to use their floss as a piece of sandpaper, hoping to wear down a snag. This is a dangerous trap because restorations like veneers are bonded with incredible precision. If you apply excessive lateral force, you risk creating micro-fractures in the porcelain or compromising the cement. According to a study by the American Academy of Cosmetic Dentistry (AACD), the failure of cosmetic restorations is often linked to improper home care techniques that prioritize force over finesse. If you are constantly wondering why your veneers feel tight against your natural teeth, it might be due to a slight misalignment or an overhang that requires a professional polish, not more muscle.
Should You Worry if Floss Always Breaks on Your Crown?
The short answer is yes, but not for the reason you think. It is rarely the crown itself that is failing, but rather the environment around it. When floss shreds consistently in one spot, it is often a sign of open contacts or a rough margin. In the world of cosmetic dentistry, achieving a natural look is paramount, but the functional fit is what ensures longevity. If you ignored a snag on a natural tooth, you might just get a cavity; if you ignore it on an implant, you could be looking at peri-implantitis. While the truth about the lifespan of a dental implant is that they are incredibly durable, the health of the surrounding gum tissue is dependent on a clean exit for your floss. Another hidden nuance involves the difference between various types of restorations. When comparing veneers vs. crowns: which is right for your smile, we often focus on how much tooth structure is removed. However, we should also consider the floss-ability. Crowns have a 360-degree margin that can be trickier to navigate than the partial margin of a veneer. If you have been told you need a veneers transformation, make sure to ask your dentist about how they finish those margins. A poorly finished edge is the number one reason why your porcelain veneers look opaque and not natural or feel bulky. We also have to address the advanced mistake of ignoring bone health. If you are exploring the truth about getting dental implants if you have existing bone loss, you should know that the way your teeth shift can change your floss gaps entirely. Shifts in bone density can tighten contacts that used to be easy to clean. Have you ever fallen into this trap where you thought your teeth were just getting tighter with age? Let me know in the comments. Using cosmetic dentistry secrets to maintain your smile isn’t just about whitening; it’s about understanding the physics of your bite. If you’re noticing new snags or persistent pressure, it is time to contact us for a professional evaluation before a simple piece of floss turns into a costly repair.I personally do not use the standard wax-coated nylon thread anymore. I switched to PTFE tape—you might know it by brand names like Glide—because it is essentially the same high-performance material used to seal pipe threads in precision plumbing. It is nearly impossible to shred, which is a lifesaver when navigating tight contacts. If you are serious about your cosmetic dentistry results, you need a tool that respects the microscopic margins of your teeth. For my friends with implants, I always recommend keeping a set of TePe interdental brushes in the medicine cabinet. Unlike a standard brush, these tiny, specialized tools get into the concave areas around an implant post that even the best floss will miss.
Swap Your Cheap String for Professional PTFE Tape
If you want a snag-free experience, you have to upgrade your materials. I keep a spool of high-tensile PTFE tape in my travel kit because it has a significantly lower coefficient of friction than traditional nylon. This means it slides into tight contacts without that jarring ‘snap’ that usually causes gum trauma and inflammation. When you are following family dentistry tips for a lifetime of healthy smiles, the quality of your thread matters just as much as your hand technique. I have found that cheaper, generic floss often contains binders that can leave a sticky residue on the very restorations you are trying to keep pristine. 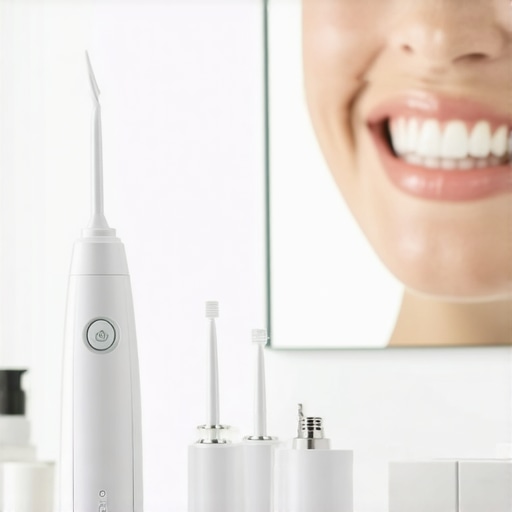
How do I maintain my dental restorations over time?
The secret to longevity is consistency paired with the right pressure. Beyond just flossing, you should be using a water flosser at least once a day to flush the sulcus. According to the Gordon J. Christensen Clinicians Report, a highly respected resource for clinical dental data, using a high-quality water flosser can reduce gingival inflammation by up to 50% more effectively than string floss alone, particularly around the complex margins of crowns and bridges. It is not just about removing food; it is about disrupting the biofilm that likes to colonize where your tooth meets the porcelain. If you have invested in a veneers transformation, this one simple habit will likely double the lifespan of your investment.
Look Out for Bioactive Materials in the Coming Decade
We are rapidly moving toward an era where your dental work won’t just be inert porcelain. I predict that in the next few years, we will see the widespread adoption of bioactive cements that actually release calcium and phosphate to ‘recharge’ the surrounding tooth structure. This is a massive leap forward in the future of dental implants and restorative care. Instead of just sitting there, your restorations will actively fight decay at the margins. For now, we rely on expert tips for perfect results, but the technology is catching up to our needs. Even dental implants in 2025 are already incorporating smarter surface textures to encourage faster, more stable bone integration. If you want to keep your smile in peak condition, I challenge you to try the double-knot trick tonight even if you don’t have something stuck. You will be shocked at how much more debris a simple knot can pull from those tight gaps. If things still feel tight or uncomfortable, do not wait for a piece of thread to break; reach out and contact us to ensure your alignment is still functioning exactly as it should.
What Your Gums Are Really Saying When the Floss Starts Shredding
I used to think that a shredding thread was just a sign of having tough teeth, but the truth is much more nuanced. When you experience frequent snags, it is often a silent signal that your restoration margin needs a professional polish or that you have a microscopic overhang. One of the most important family dentistry lessons I have learned is that patience saves porcelain. If you feel that familiar tug, stop immediately. Pushing through does not make you a better flosser; it just increases the risk of a small chip on your molar which can lead to bigger repairs later. Also, if you notice that your teeth feel sticky even after a thorough brushing, it might be waxy residue from cheap floss caught on a rough edge rather than actual plaque. Always prioritize the health of the gum pocket, as this is where the real longevity of your dental work is determined. #IMAGE_PLACEHOLDER_E#
My Personal Survival Kit for a Flawless Smile
After years of trial and error in my own bathroom, I have narrowed down my must-have tools for anyone serious about their cosmetic dentistry investment. First, ditch the generic nylon and look for PTFE tape; its high-performance glide is unmatched for tight contacts. Second, if you have any metal-work, mastering the secret to flossing comfortably with a permanent retainer involves using thin interdental brushes rather than trying to thread a needle every night. I also highly recommend keeping a high-quality water flosser on your counter; it is the single most effective way to protect the investment you made in your veneers transformation without causing mechanical wear.
Take Charge of Your Oral Longevity Today
Your smile is a living, breathing part of your health, and treating it with finesse rather than force will ensure it lasts a lifetime. Whether you are dealing with natural teeth or the latest innovations in dental implants, the goal remains the same: a clean, snag-free environment. Don not let a minor flossing mishap discourage you from your routine. Use these family dentistry tips for a lifetime of healthy smiles to turn a moment of panic into a proactive habit. If you ever feel like a gap has become too difficult to manage, it is always better to contact us for a quick check-up than to risk damage at home. Have you ever had a piece of floss get stuck in the exact same spot every time? Tell me about your most stubborn tooth in the comments below!