I remember it like it was yesterday—sitting on my couch with a bag of pretzels, watching a movie, when I felt that unmistakable *pop*. My heart sank. I’d only had my braces for three months, and there it was: a bracket sliding back and forth on the wire, completely detached from my tooth. I was terrified I’d have to start my treatment all over again or that my tooth would suddenly drift out of place by Monday morning. It’s a visceral, annoying sensation, and if you’re feeling it right now, I know exactly what’s going through your head. You’re probably wondering if you need to call the emergency line or if you can just ignore it.
Stop the Panic and Save Your Saturday
Here is the truth: a loose bracket is annoying, but it isn’t the end of the world. Today, I’m going to walk you through the DIY fixes that actually work—and the ones that will definitely land you in the “hall of shame” at your next appointment. We will cover everything from using orthodontic wax to managing a sharp wire poking your cheek. I want you to feel as confident handling your braces as you would choosing the right shade for your new porcelain veneers.
Is This Really Going to Ruin My Straight Smile?
The biggest fear I had during my first “bracket incident” was that my teeth would immediately start shifting back to their old, crooked ways. I even worried it might feel as weird as when your teeth feel loose during an orthodontic shift. But here’s a secret I learned the hard way: your teeth aren’t going to move significantly in 48 hours. I once tried to “help” the situation by poking at the bracket with a pair of tweezers, trying to force it back into place. That was a huge mistake. I ended up bending the wire, which actually caused more discomfort than the loose bracket itself. Trust me, the best thing you can do right now is stabilize the area and wait for professional help. Interestingly, the American Association of Orthodontists points out that while brackets can come loose due to sticky foods or poor bonding, it is rarely a reason for an ER visit. Most situations can be managed at home with simple tools. Have you ever had a bracket pop off at the worst possible moment? Tell me your “ortho horror story” in the comments! Before we dive into the step-by-step guide, let’s make sure you aren’t dealing with other issues, like the dull ache after your braces are adjusted, which requires a slightly different approach.
Assess the Situation Without Making it Worse
Your first instinct is probably to poke at the loose piece with your tongue until it drives you insane. Resist that urge. Use a clean finger or a cotton swab to gently slide the bracket back to the center of the tooth. If it’s still attached to the wire but just spinning, that’s actually good news—it means the wire is still doing most of the heavy lifting. Think of your braces like a train track; the wire is the rail and the bracket is the car. Even if one car is wobbly, the rail keeps everything in line. Just make sure you aren’t dealing with a more serious issue like how to handle a chipped front tooth on a Friday night, which would require a much faster call to the office.
Master the Art of the Wax Plug
This is where the magic happens. Orthodontic wax is your best friend, but only if you use it correctly. The mistake I made during my ‘taco incident’ was trying to apply wax to a wet surface. I was starving, my bracket was dangling, and I just slapped a piece of wax on it and took a bite. The wax immediately detached and I almost swallowed it. The trick is to dry the bracket and the surrounding area completely using a Q-tip or a clean tissue. Once it’s bone-dry, roll a pea-sized amount of wax between your fingers to warm it up, then press it firmly over the bracket. 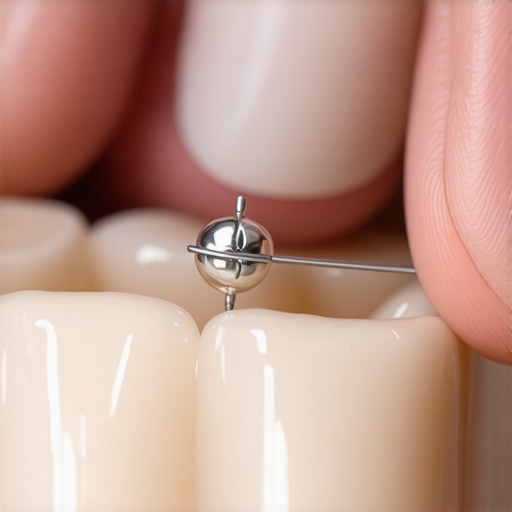
Handle a Rogue Wire Without Panic
Sometimes the bracket doesn’t just get loose; it slides off the end of the wire, leaving a sharp point that feels like a needle against your inner cheek. If this happens, you can use the eraser end of a pencil to gently push the wire back toward the tooth or tuck it behind the main archwire. It’s a bit like tucking in a loose thread on a sweater—don’t pull, just reposition. If the wire is still causing grief, check out this guide on how to fix a sharp wire poking your cheek for more advanced maneuvers. Keeping the area clean is also vital during this time, so don’t forget the benefit of using a water flosser with your braces to clear out debris that might get trapped behind the loose hardware.
Modify Your Diet Until the Appointment
While you wait for your orthodontist to rebond the bracket, treat your mouth like a construction zone. Avoid anything crunchy, sticky, or requiring a heavy ‘bite-and-pull’ motion. This is the time for yogurt, mashed potatoes, and smoothies. I learned this the hard way when I thought a ‘soft’ granola bar would be fine—it wasn’t, and I ended up with two loose brackets instead of one. If you’re someone who prioritizes family dentistry tips for a lifetime of healthy smiles, you know that preventative care is easier than the fix. The same logic applies here: don’t test the limits of your remaining brackets. It’s also worth noting that a loose bracket can sometimes cause slight gum irritation. If the area feels tender, a warm salt water rinse can work wonders. This is a classic trick used to reduce inflammation. I remember my orthodontist telling me that while a bracket fix takes five minutes in the chair, the damage from neglect can take weeks to heal. So, even if it doesn’t hurt, keep the area pristine. If you’re also managing other cosmetic work, like worrying about why your veneers feel bulkier than your natural teeth, just remember that every orthodontic journey has these little speed bumps.While a loose bracket is a temporary nuisance, it often opens the door to a much larger conversation about long-term dental aesthetics and health. Most people assume that getting a ‘perfect’ smile is as simple as gluing on some white shells or popping in a titanium post, but there is a sophisticated science to it that goes beyond the surface. In fact, the biggest mistake I see—and one that many ‘bargain’ clinics gloss over—is the obsession with pure white.
White Isn’t Always Right: Why Natural Translucency Wins
Everyone says you should aim for the brightest shade on the chart, but in my experience, that is exactly how you end up with a smile that looks like a row of chiclets. Real teeth have depth and translucency. If your dentist doesn’t account for how light passes through the material, you’ll find that your porcelain veneers look opaque and fake. The American Academy of Cosmetic Dentistry (AACD) emphasizes that the ‘ideal’ smile mimics the natural gradations of enamel, which is actually slightly more transparent at the biting edges. If you ignore this, you might notice the reason your veneers look different in sunlight versus indoors is due to a lack of internal ‘fire’ or light-scattering properties. Have you ever fallen into the trap of choosing a shade that looked great in the office but blinding in the car? Let me know in the comments.
Why is my dental implant showing a shadow at the gumline?
This is a question that haunts many patients a few months after their procedure. It’s a nuance that many people get wrong: they think the implant itself is failing. Often, it’s not the implant, but the thickness of the gum tissue (the biotype). If the tissue is too thin, the dark metal of the post can peek through, creating a greyish tint. This is why how dental implants reshape your oral health in 2025 involves a heavier focus on soft-tissue grafting before the post even goes in. Ignoring the ‘foundation’—the gums and bone—is the ultimate ‘oops’ factor. You can have the most expensive crown in the world, but if the surrounding environment isn’t healthy, you’ll eventually see the red flags that your dental implant is being rejected. 
The Hidden Trap of Skipping Your Foundation Work
The most dangerous mistake you can make in cosmetic dentistry secrets to boost your confidence is prioritizing the ‘after’ photo over the functional ‘before.’ For example, if you have a slight bite misalignment, placing veneers without correcting it can lead to ‘debonding’—the fancy word for your expensive new tooth popping off just like that loose bracket we talked about. This is why family dentistry tips for a lifetime of healthy smiles always start with structural integrity. We have to ensure your jaw is moving correctly before we worry about the shade of the porcelain. If you treat your mouth like a construction project, you have to level the ground before you paint the walls. Understanding these nuances—from light refraction in porcelain to gum biotypes—is what separates a ‘done’ smile from a ‘designed’ smile.Once you have moved past the initial ‘oops’ moments of a loose bracket or the adjustment period of a new implant, the real work begins. I like to think of my smile as a high-performance engine; you wouldn’t buy a Ferrari and then skip the oil changes, right? To keep everything running smoothly, you need a toolkit that goes beyond a standard plastic toothbrush.
Stop Brushing Like You’re Scrubbing a Tile Floor
Most people approach their dental hygiene with way too much aggression. If you have just invested in expert tips for perfect results with veneers, the last thing you want to do is wear down the margins with a hard-bristled brush. I personally switched to a sonic toothbrush with a built-in pressure sensor. It literally vibrates differently if I press too hard. This is crucial because the signs your receding gums are caused by your toothbrush are often invisible until the damage is done. For those with implants, the stakes are even higher. I recommend the Waterpik Aquarius; the specialized ‘Plaque Seeker’ tip is a game-changer for cleaning around the base of an implant post where traditional floss can’t quite reach. 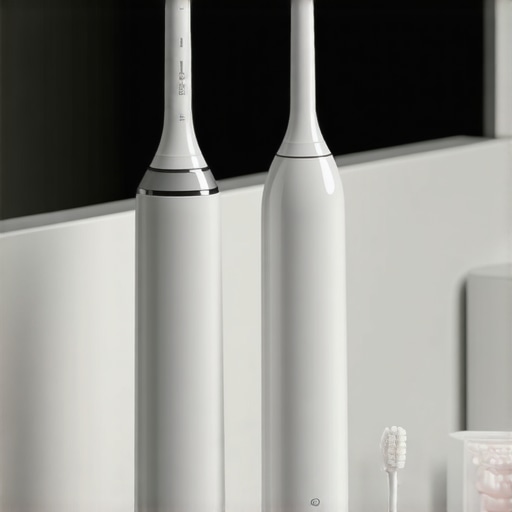
How do I maintain my dental work over time?
Longevity is all about managing chemistry and friction. First, ditch any toothpaste containing abrasive silica or charcoal. As highlighted in a study by the Journal of Prosthetic Dentistry regarding the fatigue resistance of lithium disilicate, the surface integrity of your restorations is paramount to preventing micro-fractures. I use a non-abrasive gel that keeps the porcelain polished without scratching. Second, you have to be a ‘stain-management’ pro. I’m a three-cups-of-coffee-a-day person, so I had to learn how to maintain your white smile after a coffee habit by rinsing with water immediately after my last sip. This prevents the tannins from settling into the microscopic pores of your natural teeth and the bonding resin. If you’re really serious about family dentistry tips for a lifetime of healthy smiles, you should also look into custom-fitted night guards. Even if you don’t think you grind your teeth, the ‘micro-clench’ that happens during stress can put thousands of pounds of pressure on your veneers transformation, eventually leading to chips.
The Future of High-Tech Smile Protection
We are entering an era where the future of dental implants involves smart sensors that can detect early signs of inflammation before you even feel pain. I predict that within the next five years, we will see AI-integrated mouthguards that sync to your phone to track grinding patterns and pH levels in real-time. This level of data is the ultimate secret in cosmetic dentistry secrets to boost your confidence. Pro Tip: Tonight, try the ‘dry brush’ method before your regular routine. Brush with a dry, soft toothbrush for two minutes to physically disrupt the biofilm, then follow up with your paste. It’s an advanced technique that ensures you aren’t just relying on the minty flavor to feel clean.
Hard Truths from My Years in the Ortho Chair
If there is one thing I have learned through every loose bracket and every adjustment, it is that patience is your greatest clinical tool. It is tempting to panic when you see a shift, but your mouth is incredibly resilient. I also realized that “perfect” is often the enemy of “natural.” When you are looking into cosmetic dentistry secrets to boost your confidence, remember that the most beautiful smiles have character, not just symmetry. Lastly, never underestimate the power of a quick rinse. Whether it is after a coffee or a sugary snack, that 30-second habit saves your enamel more than any expensive whitening strip ever could.
My Personal Survival Kit for a Lifetime Smile
I do not just recommend these tools because they are popular; I use them because they saved my dental work from premature wear. First, if you have hardware, the benefit of using a water flosser with your braces cannot be overstated—it reaches the gaps where bacteria hide. Second, I swear by a pressure-sensing electric toothbrush. It is the only way to ensure you are not seeing the signs your receding gums are caused by your toothbrush. Finally, keep a small tin of orthodontic wax in every bag you own. You never know when a wire will decide to go rogue on a Friday night.
Building a Legacy Beyond Just Straight Teeth
Your smile is an investment that matures over decades, not just the months you spend in braces. Whether you are navigating the nuances of family dentistry tips for a lifetime of healthy smiles or planning a total aesthetic overhaul, the goal is always the same: a healthy, functional, and confident you. Don’t let a minor setback like a loose bracket discourage you from the finish line. Every small adjustment is just another step toward the version of yourself that smiles without hesitation. Have you ever had a bracket pop off at the absolute worst possible moment, like right before a date or a big presentation? Let me know your story in the comments below!