I was sitting in my car, three days after my big veneers transformation, and I couldn’t stop smiling at the rearview mirror. But then, my tongue did that thing it always does—it went exploring. Instead of the glass-smooth surface I was promised, I felt it: a gritty, sandpaper-like texture right at the edge of my front tooth. I panicked. My first thought was that the porcelain was already disintegrating or that I’d somehow chipped it on a piece of toast. It felt huge, even though I couldn’t see a thing in the mirror. If you’re currently running your tongue over a rough spot and wondering if you made a massive mistake, I’ve been exactly where you are. We’re going to figure out why this happens and why it’s usually a much easier fix than you think.
The Moment My Tongue Found That Rough Patch
When you invest in cosmetic dentistry, you aren’t just looking for a better smile; you’re looking for that perfect feeling. A rough veneer isn’t just a physical sensation; it’s a mental hurdle. You start obsessing. You start wondering if your veneers were bonded correctly to the enamel or if the lab made a mistake. I spent a whole week convinced I was that patient who would have to go back and complain. I even made the rookie mistake of trying to buff the spot with a little extra pressure from my toothbrush, which did absolutely nothing except make my gums bleed. Trust me, you cannot scrub away a bonding error.
Is this sandpaper feel just something I have to live with?
Absolutely not. You didn’t pay for a smile that feels like a sidewalk. Usually, that roughness is just flash—a tiny bit of excess bonding resin that escaped the initial polishing phase. The American Academy of Cosmetic Dentistry notes that even the most skilled dentists can occasionally leave a microscopic amount of cement, which your tongue—one of the most sensitive parts of your body—perceives as a mountain. It’s a common hiccup, but it’s one that needs professional attention rather than a DIY approach. Have you found yourself constantly checking a specific spot with your tongue throughout the day? It’s more distracting than a popcorn kernel stuck in your molar, isn’t it?
Why your tongue is picking up on those tiny imperfections
The human tongue is capable of detecting differences in texture as small as a few microns. This means that even if your veneers look perfect in the bright lights of the dental office, they might feel completely different once the numbing agent wears off and you’re back in the real world. Sometimes, the roughness comes from the way the porcelain was finished at the lab, or it might be a result of the etching process used to make the bond strong. If that polish isn’t 100% perfect, you’re going to feel it. In my case, I was so afraid of damaging the new work that I didn’t want to tell my dentist I felt a scratch. I even thought I could polish a scratched veneer at home. Please, learn from my error: don’t touch it. Let’s look at the real reasons behind that grit and how to talk to your dentist about it without feeling like a nuisance. [image placeholder]When I finally sucked up my pride and went back to the office, my dentist didn’t even look surprised. He grabbed a small, flexible disc that looked like a tiny piece of fine-grit sandpaper for a jewelry box. In less than sixty seconds, that irritating snag was gone. I’d spent three days obsessing over something that took less time to fix than brewing a cup of coffee. Most of the time, that gritty sensation is just ‘flash’—the industry term for excess bonding material. It’s like when you’re painting a room and a tiny drip dries on the baseboard; you don’t need to repaint the whole wall, you just need to scrape off the drip. I actually tried to use a wooden toothpick to flick off what I thought was a crumb before my appointment, and all I did was make my gums bleed and feel sore for a day. Learn from me: let the tools do the work.
Turn that sandpaper feel into a mirror finish
Map out the grit before you sit in the chair
Before you head back to the clinic, use your tongue to locate the exact coordinates of the roughness. Is it on the biting edge? Is it tucked up near the gum line? When you are numb or lying back in the chair, it is much harder to find those microscopic bumps. I made the rookie mistake of being vague, saying ‘it is somewhere on the left,’ and we spent ten minutes hunting for a spot that I could have pointed to in seconds. Being precise helps your dentist know if they need to check how your veneers were bonded to the enamel or if it is just a surface-level polish issue.
Why polishing discs are the unsung heroes of smooth teeth
Your dentist uses a sequence of graduating grits to achieve that glass-like texture. It is exactly like transforming your smile with veneers using expert finishing techniques. They start with a slightly coarser disc to remove the excess resin and finish with a polishing paste that has the consistency of thick frosting but the power to create a high-gloss shine. This is why you should never try to polish a scratched veneer at home. Without that ‘graduated’ approach, you risk stripping the glaze off the porcelain entirely, leaving it dull and prone to staining. 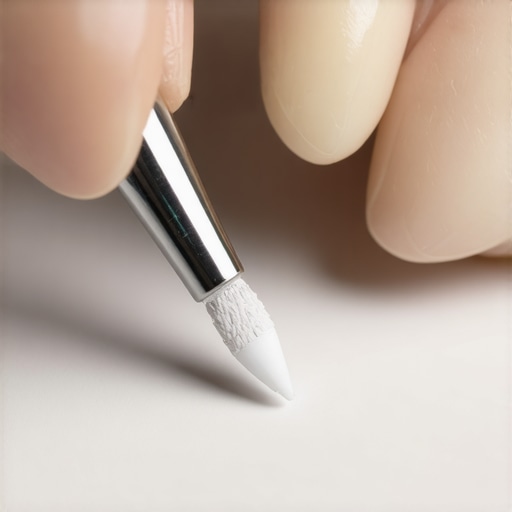
Use the floss test to catch hidden bonding errors
If you feel like your porcelain veneers might feel bulky at first, or if your floss is shredding between the teeth, you are likely dealing with an ‘overhang.’ This happens when the bonding material bridges the tiny gap between two teeth. Think of it like a stray thread on a silk sweater; if you force the floss through, you might cause a bigger problem. A dentist will use a ‘serrated strip’—which looks like a microscopic, metal piece of dental floss—to clear that path instantly. Ensuring these tight spots are smooth is one of the 3 secrets to making your porcelain veneers last twenty years because smooth edges prevent plaque from hitching a ride on rough, hidden surfaces.Most people think the ultimate goal of cosmetic dentistry is a surface so smooth it is like a skating rink. But here is the contrarian truth: if your veneers are too smooth, they look like plastic. The reason your porcelain veneers look opaque and not natural is often a lack of surface ‘characterization.’ Real teeth have tiny ridges and lobes that catch the light. The ‘hidden nuance’ here is distinguishing between the grit of excess cement—which is a mistake—and the deliberate texture of high-end lab work. When I first got mine, I wanted them perfectly flat, but my dentist explained that without those micro-imperfections, the light bounces off in a way that screams ‘artificial.’
Why do some veneers lose their luster while others stay glossy for decades?
It usually comes down to the quality of the glaze and your daily habits. A study published in the Journal of Prosthetic Dentistry highlights that surface roughness isn’t just about how it feels; it actually dictates how much plaque adheres to the porcelain. If a dentist over-polishes or uses the wrong abrasive during a cleaning, they can strip the factory glaze. Once that glaze is gone, the porcelain becomes porous and loses its light-reflecting properties. This is one of the 3 secrets to making your porcelain veneers last twenty years: you have to protect that original finish. Have you ever noticed your smile looking a bit ‘duller’ after a few years? Have you ever fallen into this trap? Let me know in the comments.#IMAGE_PLACE_HOLDER_C#
Don’t mistake surface lines for structural failure
The biggest ‘oops’ factor I see is patients who mistake a ‘craze line’ for a structural crack. A craze line is a microscopic surface-level hairline that doesn’t affect the integrity of the tooth, but if you panic and try to ‘buff’ it out yourself, you will create a real problem. You might end up needing to know how to fix a chipped veneer without replacing the whole unit because you weakened the porcelain by over-polishing at home. Before you decide on a treatment plan, make sure you understand veneers vs. crowns: choosing the best option for your smile, as the thickness of the material determines how much texture it can safely hold. Also, watch out for those 6 habits that cause your porcelain veneers to pop off unexpectedly, like using your teeth as tools, which creates micro-fractures that feel gritty long before the veneer actually fails.I used to think my job was done once the dental chair went down and the bill was paid. But keeping that veneers transformation looking fresh is actually where the real work begins. I’ve become a bit of a nerd about the tools I use. For instance, I threw away my traditional oscillating toothbrush the moment my dentist showed me under a microscope what hard bristles do to porcelain glaze. Now, I swear by the Philips Sonicare ProtectiveClean—not just because it’s popular, but because the pressure sensor is a lifesaver. If you press too hard, it pulses. This prevents the micro-scratches that eventually lead to why your porcelain veneers look opaque and not natural.
How do I maintain my veneers over time?
The secret isn’t just brushing; it’s the chemistry of what you put in your mouth. Dr. Pascal Magne, a legendary figure in biomimetic restorative dentistry and author of ‘Biomimetic Restorative Dentistry’, often emphasizes that the bond is only as strong as the environment we create for it. I’ve switched to a specific non-abrasive gel because most whitening toothpastes are basically liquid sandpaper, and using them is one of the 6 habits that cause your porcelain veneers to pop off unexpectedly. If you want that glass finish to last, you have to treat it like a luxury car rather than a kitchen floor.
Ditch the abrasive pastes before they ruin the glaze
I also started using a cordless Waterpik on a medium setting to clear out the ‘shelf’ where the veneer meets the gum. If you don’t keep that area pristine, you’ll eventually end up wondering why your gums are receding even though you brush twice a day. It is about precision, not power. Unlike traditional flossing, which can occasionally snag on a tiny bit of remaining ‘flash’, the water flosser flushes the sulcus without mechanical stress on the porcelain margins. 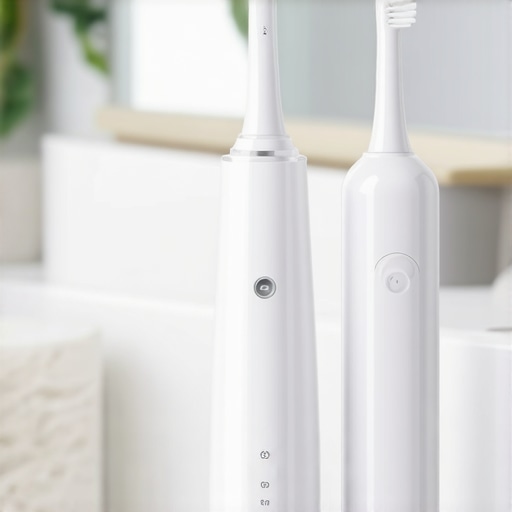
The tech shift towards smarter home monitoring
Looking ahead to 2025 and beyond, I see a shift toward AI-integrated home care. We are already seeing the first stages of dental implants 2025 innovations, and soon, your toothbrush will likely scan for early margin decay or microscopic chips and send a report to your clinic. This kind of proactive tech will make family dentistry tips for a lifetime of healthy smiles much easier to follow because the guesswork is gone. We are moving away from reactive ‘drilling and filling’ and toward a future where maintenance is guided by data. I want you to try one thing this week: grab a flashlight and look at the margins of your teeth in the mirror. If you see even a hint of a dark line or feel a rough edge, don’t wait for your six-month cleaning. Go in and ask for a professional polish. It’s the difference between a ten-year lifespan and the 3 secrets to making your porcelain veneers last twenty years. If you are unsure about how your current restoration is holding up, contact us to get a professional evaluation of those porcelain edges.
Lessons I Gathered from My Own Mirror-Checking Phase
Looking back, those three days of panic taught me more about my veneers transformation than the entire preparation appointment. First, I learned that your tongue is like a high-powered microscope; it will amplify a microscopic speck of resin until it feels like a boulder. Second, I realized that true cosmetic dentistry isn’t just about the visual result—it is about how that result integrates with your life. If you are constantly distracted by a snag, the transformation isn’t complete yet. Finally, I discovered that being a vocal patient is actually helpful. My dentist appreciated the feedback because he wanted the work to be a masterpiece, and he couldn’t feel what I was feeling.
The Daily Gear That Keeps My Smile Polished
Maintenance is where the real magic happens. To keep that glass-like feel, I have curated a specific toolkit that I swear by. I swapped my old manual brush for a Philips Sonicare ProtectiveClean with a built-in pressure sensor. This is vital because knowing how to pick a toothbrush that won’t destroy your enamel is the first step in protecting your porcelain glaze from micro-scratches. I also rely on a cordless Waterpik to ensure the “shelf” where the veneer meets the gum stays debris-free without the risk of snagging traditional floss on a tight margin. For toothpaste, I avoid anything labeled “whitening” and stick to non-abrasive dental gels that won’t act like sandpaper on the finish over time.
[image placeholder]
Trust Your Senses and Take Action
You didn’t invest in your smile to feel uncomfortable every time you take a sip of water or speak. Whether you are already following the 3 secrets to making your porcelain veneers last twenty years or you are just starting your journey, remember that comfort is a key indicator of quality. If something feels gritty, sharp, or just “off,” it is a clear signal to check in with your provider. A quick professional polish can be the difference between a lifetime of confidence and a week of unnecessary stress. If you are ready to get that perfectly smooth finish back, contact us today to schedule a quick check-up and let us get your smile back to its glass-like glory.
Did you notice a rough spot right after your procedure, or did it develop over time? Let me know in the comments below!