I still remember the “Great Whitening Disaster of 2018.” I was getting ready for my brother’s wedding, and I wanted my smile to really pop. I grabbed a box of extra-strength strips from the drugstore, thinking more power meant better results. Big mistake. Ten minutes in, I felt a sharp, electric jolt—what we “sensitive folks” call a zinger—that nearly brought me to my knees. I spent the next three days avoiding cold air, hot coffee, and even breathing too deeply through my mouth. It was a miserable lesson in why those of us with thin or reactive enamel can’t just follow the standard playbook.
Stop Punishing Your Enamel for Wanting a Brighter Smile
If you’re like me, you’ve probably stared at those cosmetic dentistry secrets to boost your confidence and felt a mix of envy and dread. You want the glow, but you definitely don’t want the torture. I’m here to tell you that a brighter smile shouldn’t require a high pain tolerance or a week of suffering. Today, I’m breaking down the exact routine I use to nudge my teeth several shades lighter without triggering that awful ice-pick-to-the-nerve sensation. We are going to look at why your teeth react this way and how to bypass the traditional peroxide traps that lead to misery.
Is DIY Whitening Actually Worth the Risk for You?
I used to think I could just “tough it out” with whatever was on sale. I even fell for the danger of using baking soda to whiten your teeth at home, which only made my sensitivity worse by scrubbing away the very protection my teeth needed. According to the American Dental Association, sensitivity often occurs when the peroxide in whitening products reaches the nerves in the dentin, a process that happens much faster if your enamel is already compromised or naturally thin. I made the classic error of ignoring the warning signs because I was impatient, but you don’t have to repeat my dental drama.
Why Your Sensitivity Changes the Game
Have you ever noticed the reason your teeth feel sensitive after a professional cleaning? That’s your mouth’s way of telling you that the barrier between the outside world and your dental nerves is a bit thin. When we talk about whitening, we are essentially talking about a chemical reaction occurring on your tooth surface. If we don’t prep the site first and choose the right delivery method, we’re asking for trouble. My goal is to help you navigate this without needing to hide from your refrigerator for a week. Have you ever had to stop a whitening treatment halfway through because the pain was just too much? You aren’t alone, and quite frankly, you shouldn’t have to feel that way just to get the look you want. We’re going to dive into the gentle alternatives that actually work.
Prep Your Enamel Like a Pro Athlete
Think of whitening like running a marathon; you wouldn’t just jump off the couch and sprint 26 miles without training. Your teeth need a ‘pre-conditioning’ phase to handle the chemical load of peroxide. Two weeks before you even think about opening a whitening kit, switch your toothpaste to one specifically formulated with potassium nitrate. This isn’t just marketing fluff; potassium nitrate actually travels into the tiny tubules of your teeth to soothe the nerves. I learned this the hard way back in my early twenties when I tried to whiten my teeth the morning after a dental visit. Big mistake. You need to learn how to manage tooth sensitivity after your first professional cleaning before you add more variables to the mix. By the time I actually started the whitening process, my teeth felt ‘shielded,’ and that electric shock sensation was nowhere to be found.
Pick a Delivery System That Respects Your Nerves
The delivery method is just as important as the chemical itself. Those generic, one-size-fits-all strips often slide around, getting peroxide onto your sensitive gum tissue, which leads to chemical burns and receding-look-alikes. Instead, I always recommend looking into how to choose between professional whitening and custom trays. Custom-fitted trays are the gold standard because they keep the gel exactly where it belongs—on your teeth—and away from your gums. 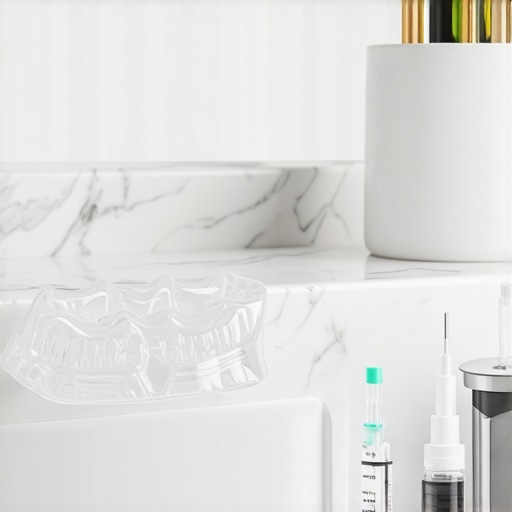 If you have existing dental work, keep in mind that peroxide only works on natural enamel. If you are curious about the reason your porcelain veneers look opaque and fake compared to newly whitened teeth, it’s because those materials don’t change color. You have to whiten first, then match your restorations to that new shade.
Master the Art of the Slow Fade
We’ve been conditioned to think that faster is better, but with sensitive teeth, ‘slow and low’ is the mantra. Instead of a 20% hydrogen peroxide gel that works in 15 minutes, opt for a 10% carbamide peroxide gel. Carbamide peroxide breaks down more slowly, giving your teeth time to adjust to the pH shift. One winter, I tried a high-concentration ‘express’ gel because I had a holiday party that night. By the time the appetizers were served, I couldn’t even drink room-temperature water. Now, I use a lower concentration for 30 minutes every other day. This ‘staggered’ approach allows the minerals in your saliva to re-enter the enamel and ‘reset’ the sensitivity levels between sessions. If you’ve ever wondered about the reason your teeth feel sensitive after a professional cleaning, it’s the same principle: your teeth are temporarily exposed, and they need a moment to breathe.
The Post-Whitening Re-Mineralization Trick
Once the tray comes out, the job isn’t done. Your enamel is slightly more porous for the next 24 to 48 hours. This is the ‘danger zone’ where you can either strengthen your teeth or accidentally stain them right back. I immediately follow up with a fluoride rinse or a calcium-phosphate paste. This acts like a sealant, filling those temporary pores and blocking the path to the nerve. It’s a similar logic to family dentistry tips for a lifetime of healthy smiles: protection is always easier than repair. Avoiding ‘chromogenic’ foods—like that dark morning brew—is non-negotiable during this window. If you simply can’t skip your caffeine fix, check out how to keep your teeth white while drinking black coffee daily to minimize the damage while your enamel is still ‘open.’
Don’t Fall for the Invincible Teeth Myth
Most people assume that once they invest in a high-end restoration, their days of worrying about dental health are over. I’ve heard it a thousand times: “It’s porcelain, it can’t get a cavity!” While technically true that the veneer or crown won’t decay, the natural tooth structure underneath is more vulnerable than ever. In my experience, the biggest mistake is relaxing your hygiene routine after a major upgrade. If you aren’t following family dentistry tips for a lifetime of healthy smiles, you risk recession that exposes the margin of your restoration, leading to those dreaded dark lines at the gumline.
Why does my dental implant feel heavy instead of natural?
It’s a common concern for patients transitioning to permanent replacements. While dental implants 2025 innovations that redefine comfort and durability have made the process smoother, an implant lacks the periodontal ligament—the “shock absorber”—that natural teeth have. This is why why your dental implant feels heavy in your jaw bone during the first few months. According to a study published in the Journal of Oral Implantology, the process of osseointegration means the titanium is fusing directly to your bone, creating a rigid connection that your brain perceives as ‘heavy’ or ‘different’ because the tactile feedback has changed.
The Trap of the One-Size-Fits-All Aesthetic
Many patients walk into a clinic asking for the brightest white possible, but this is often the mistake that makes porcelain veneers look like piano keys. Real teeth have translucency and varied saturation. If your dentist doesn’t account for your facial symmetry and skin undertones, you end up with the reason your porcelain veneers look opaque and fake. It’s also common for patients to complain that the reason your veneers feel thicker than your natural teeth is due to over-contouring. A true expert in cosmetic dentistry secrets to boost your confidence knows that the goal is to mimic nature, not replace it with something that looks like plastic. 
Avoid the Comparison Trap with Crowns and Veneers
I often see people confused about whether they need a full cover or just a facing. When you are looking at veneers vs. crowns choosing the best option for your smile, the nuance lies in the amount of healthy enamel remaining. If you choose a veneer for a tooth that actually needs the structural support of a crown, you are setting yourself up for a fracture down the road. It’s about more than just looks; it’s about the long-term mechanics of your bite. Have you ever fallen into this trap where you chose the cheaper or ‘prettier’ option only to have it fail a year later? Let me know in the comments. We need to shift the conversation from just ‘getting white teeth’ to building a foundation that lasts decades.Maintaining that high-end dental work is where most people drop the ball, but I treat my veneers and implants like I’m managing a vintage sports car. You don’t just drive it and forget it; you use the best fuel and the right tools. I personally swear by a sonic toothbrush with a built-in pressure sensor because I used to be a ‘scrubber.’ I didn’t realize that my aggressive brushing was actually a major factor in the signs your receding gums are caused by your toothbrush. If you have veneers, you need to be even more careful; that micro-vibration technology is much better at breaking up biofilm without stressing the bonding agent.
How can I make my cosmetic dental work last decades?
The secret isn’t just brushing; it’s about the tools you use for the hard-to-reach margins. For those with restorations, I always recommend a water flosser over traditional string if you have a bridge or implants. It’s significantly more effective at flushing out the sulcus—the little pocket where the restoration meets the gum. When I started using one, my hygienist actually asked me what I changed because my tissue looked so much healthier. It’s especially critical for those following transform your smile with veneers expert tips for perfect results, as keeping the gum line tight prevents that ‘fake’ looking recession. 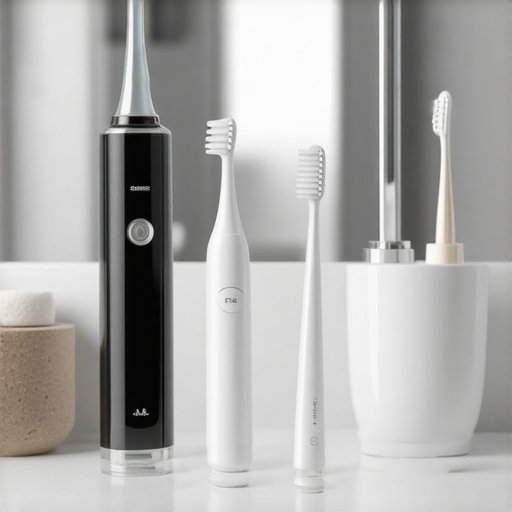
One technical detail I learned from a deep dive into the International Journal of Implant Dentistry is that many people accidentally damage their implants by using the wrong cleaners. They found that non-abrasive glycine powder air-polishing at the dentist is the move, but at home, you must avoid anything with high RDA (Relative Dentin Abrasivity) values. This is why I always tell my friends to learn how to safely clean a dental implant without scratching the post. A scratched post is a magnet for bacteria, which is the fast track to implant failure.
Looking ahead, the next five years are going to change everything. We are moving toward the future of dental implants cutting edge techniques in cosmetic dentistry that include ‘smart’ crowns equipped with sensors that can detect early-stage inflammation before you ever feel a twinge of pain. Until then, the best thing you can do is stay consistent with your checkups. If you’ve noticed anything feeling ‘off’ with your bite, don’t wait. You can always contact us to get a professional look at your specific situation before a minor adjustment turns into a major repair. My advanced tip for today? Switch to a pH-neutral mouthwash immediately. Most store-bought brands are surprisingly acidic, which can etch the surface of your beautiful new teeth over time. Give it a try for two weeks and see if your mouth feels less ‘fuzzy’ by midday.
Hard-Won Truths from a Former Tooth-Scrubber
I used to think that “more is better” when it came to oral care, but I have realized that the real secret to a veneers transformation unlocking your best smile yet is actually restraint. First, stop chasing the “refrigerator white” look; it is the fastest way to make high-quality work look like plastic. Real teeth have depth and character. Second, your gums are just as important as the enamel itself. If you ignore the tissue health, even the most expensive cosmetic dentistry secrets to boost your confidence won’t save you from a smile that looks aged or “fake” due to recession. Finally, I have learned that consistency beats intensity every single time. A gentle, weekly routine is far superior to a painful, high-strength blast once a year.
The Gear I Actually Use Every Morning
If you want to maintain your results without the dreaded “zingers,” you need the right arsenal. I personally rely on a soft-bristled sonic toothbrush with a pressure sensor and a high-quality pH-balanced rinse. For whitening, I stopped using generic strips and did my research on how to choose between professional whitening and custom trays because the custom fit makes all the difference for nerve protection. I also keep a stash of calcium-phosphate paste for those days when my enamel feels a bit thin. These aren’t just gadgets; they are the foundation for family dentistry tips for a lifetime of healthy smiles that actually last.
Your Best Smile is Just a Shift Away
You do not have to choose between a bright smile and a comfortable one. By making small, intentional changes to your routine—like slowing down your whitening sessions or prepping your enamel weeks in advance—you can achieve the aesthetic you want without the trauma. Modern cosmetic dentistry is about empowerment and long-term health, not just short-term endurance. You deserve to feel confident every time you laugh, talk, or take a photo. Have you ever had a whitening disaster or a treatment that felt way too intense for your sensitive teeth? Let me know your experience in the comments below.