I remember the morning I decided to finally upgrade my oral hygiene game. I’d spent hours reading about cosmetic dentistry secrets and felt ready for that professional-level clean. I pressed the power button, felt the high-speed vibration, and went to work. Two minutes later, I spat into the sink and my heart sank. It looked like a scene from a horror movie. My gums weren’t just pink; they were angry, pulsing, and bleeding. I panicked, thinking I’d shredded my mouth or that my enamel was paper-thin. But here’s the truth: I wasn’t dying, and neither are you. Most of us make one massive mistake when we upgrade our tech because we treat a high-powered tool like a $2 manual stick. Today, I’m going to show you exactly why this happens and how we can stop the bleeding for good.
That First Brush Shouldn’t Look Like a Horror Movie
It’s a classic “new toy” blunder. When I first started digging into family dentistry tips to keep my own household’s smiles bright, I fell into the trap of thinking more pressure meant a deeper clean. I was wrong. I ended up with sore spots and a mountain of dental anxiety. The reality is that your gums are likely reacting to a sudden change in mechanical frequency they haven’t felt in years. According to research from the American Dental Association, electric brushes are significantly more effective at removing plaque, but they require a delicate touch that most manual-brush veterans simply don’t have yet. If you’ve been wondering how to tell if your gum recession is caused by brushing too hard, that red sink is your first and loudest warning sign.
Is my new gadget actually ruining my gums?
I get it. You spent a chunk of change on a toothbrush and now you’re terrified to touch it. You’re worried you’ve triggered permanent damage or that you’ll need veneers just to hide the recession. Relax. The bleeding usually happens because you’re still trying to “scrub” the surface. My early mistake was continuing to move my hand in rapid circles while the brush was already oscillating at thousands of strokes per minute. That’s double the friction, and your delicate tissue can’t handle it. Have you ever stared at the sink and wondered if you should just throw the thing away and go back to the plastic version? I’ve been there, and I promise we can make the upgrade work. If the redness persists, it’s often a sign of underlying inflammation, and you might need to learn how to stop your gums from bleeding during a professional cleaning first to get your gum health back to a baseline where it can handle the power of an electric brush. It’s all about the transition phase, and we’re going to get through it together.
Lighten the Load on Your Gums
The biggest hurdle isn’t the technology; it’s your grip. Think of your electric toothbrush as a high-end sports car. You don’t need to push it to make it go fast; you just need to guide it. Most of us are used to the ‘hacksaw’ method of manual brushing, where we apply several pounds of pressure. With an electric motor, that’s a recipe for disaster. I remember my first week—I was pressing so hard the motor actually slowed down, and my gums felt like they’d been through a sandblaster. I had to learn to hold the handle with just my fingertips, like I was holding a delicate piece of fruit. If you’re seeing red in the sink, you’re likely overdoing the force. This is a primary reason how to tell if your gum recession is caused by brushing too hard becomes a necessary lesson early on.
Stop Scrubbing and Start Gliding
Here is the hard truth: your hand shouldn’t be moving back and forth. The brush head is doing thousands of movements per second, so your only job is to be the chauffeur. When I finally stopped the manual scrubbing motion and just let the brush sit on each tooth for two seconds, the bleeding stopped almost overnight. It felt wrong at first—like I wasn’t doing enough—but that is the secret to family dentistry tips for a lifetime of healthy smiles. You want to glide the bristles along the gum line, allowing the vibration to break up plaque without the friction of a back-and-forth stroke.
Find the Angle That Actually Cleans
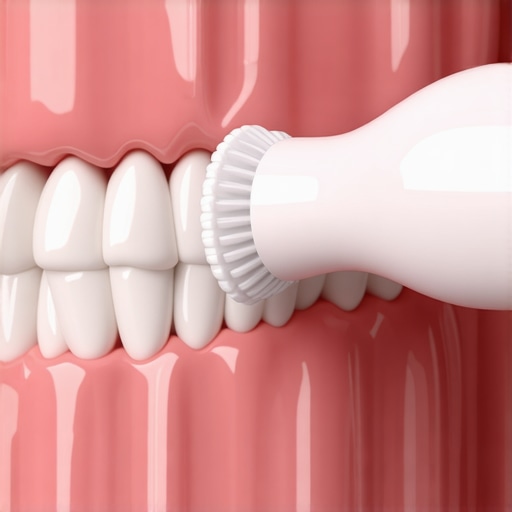
Positioning is everything. You can’t just slap the brush flat against your teeth and expect magic. You need to aim the bristles at a 45-degree angle toward the gum line. This allows the sonic or oscillating energy to reach just beneath the ‘cuff’ of the gum where the nastiest bacteria hide. I used to ignore this, brushing only the flat surfaces of my teeth, until a check-up revealed I was missing the very spots that cause inflammation. If you’ve invested in cosmetic dentistry secrets to boost your confidence, the last thing you want is puffy, red gums distracting from your white teeth.
Use the Sensitive Setting for a Week
Don’t jump straight to the ‘Pro-Clean’ or ‘Whitening’ mode. Those high-intensity settings are great once your tissue has toughened up, but they are too much for a beginner. Most high-end brushes have a ‘Sensitive’ or ‘S’ mode. Use it. I spent my first ten days on the lowest setting possible. This ‘break-in’ period allows your gums to adapt to the micro-vibrations without triggering a massive inflammatory response. If you skip this, you might find yourself wondering why your gums are receding even though you brush twice a day despite having the best tools. Your gums need a transition phase, not a shock to the system.
Focus on the Inside Surfaces First
I remember specifically on day four of my electric transition, I was so frustrated by the ‘pink sink’ that I almost switched back to my $1 manual brush. I decided to try a little experiment: I turned the brush on and barely touched it to my fingernail. I could feel the power without even pressing. I realized then that my gums didn’t need a massage; they needed a gentle cleaning. I started focusing on the backs of my teeth first—the areas we usually ignore—where the tissue is surprisingly resilient. By the time I moved to the sensitive front areas, I had found the right ‘feather touch.’ This shift in focus is what separates a basic routine from a professional-grade result, and it’s a much cheaper fix than deciding between veneers vs crowns later because of neglected gum health.
Once you’ve moved past the initial shock of a ‘pink sink,’ it’s time to talk about the nuances that many people miss—especially those who have invested in high-end dental work. There’s a common, dangerous myth in the world of family dentistry that once you get a crown, an implant, or a set of veneers, those teeth are somehow ‘invincible.’ In reality, the opposite is true. While the porcelain itself won’t decay, the interface where that material meets your living gum tissue is the new front line of your oral health. If you treat your new smile like it’s made of indestructible plastic, you’re walking straight into a very expensive trap.
Restorations Aren’t Bulletproof Armor
The biggest ‘oops’ factor I see involves people switching to electric brushes and then using abrasive charcoal or ‘extra whitening’ toothpastes. They think they’re keeping their new investment pearly white, but they’re actually micro-scratching the glaze. I’ve heard countless stories of people wondering the reason your porcelain veneer feels rough to your tongue only to realize they’ve been essentially sandpapering their smile twice a day. When you use an electric brush, the high frequency amplifies the abrasiveness of your toothpaste. If you’ve looked into expert tips for perfect results with veneers, you know that a non-abrasive gel is your best friend. Anything else is just asking for a dull, stained restoration within a few years.
Does the high-speed vibration risk loosening your expensive dental implants?
This is the question that keeps many of my readers up at night. You’ve spent months on a surgical process, and now you’re worried a sonic motor will rattle the hardware. Here is the nuance: while the vibration won’t unscrew the post from your jawbone, it can highlight issues you didn’t know were there. A study published in the Journal of Oral Implantology suggests that the health of the ‘biological seal’—the way your gums grip the implant—is actually more delicate than the attachment to a natural tooth. If you feel a strange sensation, it’s often why your dental implant feels like it is vibrating when you chew rather than a structural failure. The ‘vibration’ is often just the brush hitting the metal substructure, but it’s a great reminder that you need to be surgical with your cleaning, not aggressive.
The Hidden Margin Trap You’re Likely Missing
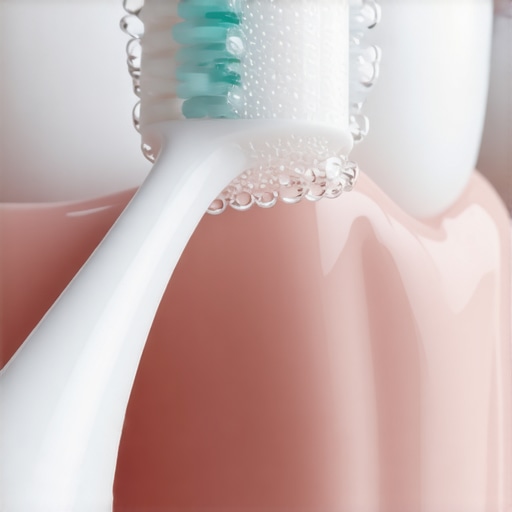
The contrarian truth about cutting-edge techniques in cosmetic dentistry is that the better the dentist, the thinner the margin—but that margin is still a ledge for bacteria. Many patients stop brushing right at the gum line because they are afraid of ‘pushing’ the gum away from their veneers or crowns. This creates a stagnant zone where plaque hardens into tartar. You might notice why your gums look dark around a crown; often, that’s not the metal showing through, but chronic inflammation from being too ‘gentle.’ You have to find the sweet spot: enough vibration to clear the margin, but not enough pressure to cause recession. Have you ever fallen into this trap of being too scared to clean your expensive dental work? Let me know in the comments.
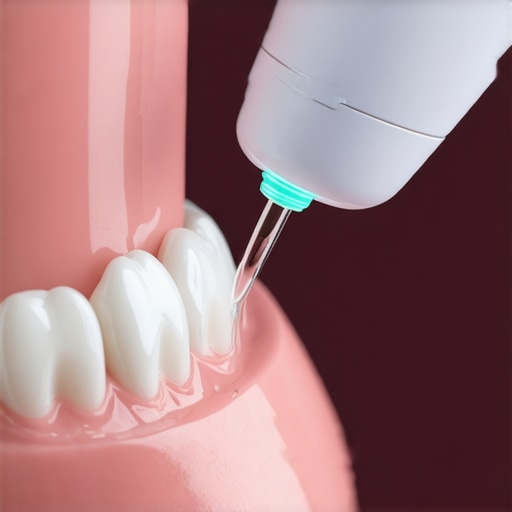
If you really want to level up your maintenance, you need to stop relying solely on string floss. I have found that for anyone with high-end restorations, a quality water flosser is non-negotiable. It is not just about the convenience; it is about the force of micro-bubbles reaching places a thread simply cannot. When I first got my dental work, I struggled with how to tell if your dental bridge is trapped with food because standard floss would often snag or miss the hidden pockets. Switching to a pressurized water tool felt like power-washing a driveway—the amount of debris it clears from under crowns and bridges is honestly shocking. This is vital because the truth about the lifespan of a dental implant is that it depends entirely on your ability to prevent biofilm buildup at the base of the post.
Ditch the String Floss for This Power Tool
I recommend using a water flosser on a medium setting twice a day. Why? Because the ‘biological seal’ around an implant is less vascular than the one around a natural tooth, making it more prone to silent infections. A study published in the International Journal of Oral & Maxillofacial Implants highlights that mechanical plaque control is the single most important factor in preventing peri-implantitis. If you fail here, you might eventually need to know how to fix the gap that appeared between your gums and your new bridge due to tissue loss. I personally use a cordless model in the shower; it’s less messy and ensures I never skip a day.
How do I maintain dental implants over time?
Maintenance is a lifelong commitment of specific hygiene and professional oversight. Beyond your daily routine, you need a dentist who understands the specific torque and cleaning requirements of titanium or zirconia. This is where family dentistry tips for a lifetime of healthy smiles really come into play. You should be getting professional ‘debridement’ with specialized plastic or titanium instruments that won’t scratch your hardware. I’ve seen too many people treat their restorations like ‘set it and forget it’ appliances, only to face complications five years down the road. Treat your implants like the medical-grade hardware they are.
Smart Technology Is Redefining Dental Longevity
Looking ahead, the industry is shifting toward ‘active’ maintenance. We are already seeing dental implants 2025 innovations that include integrated sensors to monitor pH levels and bacterial activity in real-time. In the near future, the future of dental implants will likely involve ‘smart’ crowns that can alert your phone if a loose screw is detected before you even feel a wiggle. This technology will take the guesswork out of oral health and move us into a truly preventative era. My challenge for you today: Pick up a water flosser and commit to using it on the lowest setting for one week. You will be amazed at what your toothbrush has been leaving behind.
I remember the morning I decided to finally upgrade my oral hygiene game. I’d spent hours reading about cosmetic dentistry secrets and felt ready for that professional-level clean. I pressed the power button, felt the high-speed vibration, and went to work. Two minutes later, I spat into the sink and my heart sank. It looked like a scene from a horror movie. My gums weren’t just pink; they were angry, pulsing, and bleeding. I panicked, thinking I’d shredded my mouth or that my enamel was paper-thin. But here’s the truth: I wasn’t dying, and neither are you. Most of us make one massive mistake when we upgrade our tech because we treat a high-powered tool like a $2 manual stick. Today, I’m going to show you exactly why this happens and how we can stop the bleeding for good.
That First Brush Shouldn’t Look Like a Horror Movie
It’s a classic “new toy” blunder. When I first started digging into family dentistry tips to keep my own household’s smiles bright, I fell into the trap of thinking more pressure meant a deeper clean. I was wrong. I ended up with sore spots and a mountain of dental anxiety. The reality is that your gums are likely reacting to a sudden change in mechanical frequency they haven’t felt in years. According to research from the American Dental Association, electric brushes are significantly more effective at removing plaque, but they require a delicate touch that most manual-brush veterans simply don’t have yet. If you’ve been wondering how to tell if your gum recession is caused by brushing too hard, that red sink is your first and loudest warning sign.
Is my new gadget actually ruining my gums?
I get it. You spent a chunk of change on a toothbrush and now you’re terrified to touch it. You’re worried you’ve triggered permanent damage or that you’ll need veneers just to hide the recession. Relax. The bleeding usually happens because you’re still trying to “scrub” the surface. My early mistake was continuing to move my hand in rapid circles while the brush was already oscillating at thousands of strokes per minute. That’s double the friction, and your delicate tissue can’t handle it. Have you ever stared at the sink and wondered if you should just throw the thing away and go back to the plastic version? I’ve been there, and I promise we can make the upgrade work. If the redness persists, it’s often a sign of underlying inflammation, and you might need to learn how to stop your gums from bleeding during a professional cleaning first to get your gum health back to a baseline where it can handle the power of an electric brush. It’s all about the transition phase, and we’re going to get through it together.
Lighten the Load on Your Gums
The biggest hurdle isn’t the technology; it’s your grip. Think of your electric toothbrush as a high-end sports car. You don’t need to push it to make it go fast; you just need to guide it. Most of us are used to the ‘hacksaw’ method of manual brushing, where we apply several pounds of pressure. With an electric motor, that’s a recipe for disaster. I remember my first week—I was pressing so hard the motor actually slowed down, and my gums felt like they’d been through a sandblaster. I had to learn to hold the handle with just my fingertips, like I was holding a delicate piece of fruit. If you’re seeing red in the sink, you’re likely overdoing the force. This is a primary reason how to tell if your gum recession is caused by brushing too hard becomes a necessary lesson early on.
Stop Scrubbing and Start Gliding
Here is the hard truth: your hand shouldn’t be moving back and forth. The brush head is doing thousands of movements per second, so your only job is to be the chauffeur. When I finally stopped the manual scrubbing motion and just let the brush sit on each tooth for two seconds, the bleeding stopped almost overnight. It felt wrong at first—like I wasn’t doing enough—but that is the secret to family dentistry tips for a lifetime of healthy smiles. You want to glide the bristles along the gum line, allowing the vibration to break up plaque without the friction of a back-and-forth stroke.
Find the Angle That Actually Cleans
Positioning is everything. You can’t just slap the brush flat against your teeth and expect magic. You need to aim the bristles at a 45-degree angle toward the gum line. This allows the sonic or oscillating energy to reach just beneath the ‘cuff’ of the gum where the nastiest bacteria hide. I used to ignore this, brushing only the flat surfaces of my teeth, until a check-up revealed I was missing the very spots that cause inflammation. If you’ve invested in cosmetic dentistry secrets to boost your confidence, the last thing you want is puffy, red gums distracting from your white teeth.
#IMAGE_PLACE_HOLDER_B#
Use the Sensitive Setting for a Week
Don’t jump straight to the ‘Pro-Clean’ or ‘Whitening’ mode. Those high-intensity settings are great once your tissue has toughened up, but they are too much for a beginner. Most high-end brushes have a ‘Sensitive’ or ‘S’ mode. Use it. I spent my first ten days on the lowest setting possible. This ‘break-in’ period allows your gums to adapt to the micro-vibrations without triggering a massive inflammatory response. If you skip this, you might find yourself wondering why your gums are receding even though you brush twice a day despite having the best tools. Your gums need a transition phase, not a shock to the system.
Focus on the Inside Surfaces First
I remember specifically on day four of my electric transition, I was so frustrated by the ‘pink sink’ that I almost switched back to my $1 manual brush. I decided to try a little experiment: I turned the brush on and barely touched it to my fingernail. I could feel the power without even pressing. I realized then that my gums didn’t need a massage; they needed a gentle cleaning. I started focusing on the backs of my teeth first—the areas we usually ignore—where the tissue is surprisingly resilient. By the time I moved to the sensitive front areas, I had found the right ‘feather touch.’ This shift in focus is what separates a basic routine from a professional-grade result, and it’s a much cheaper fix than deciding between veneers vs crowns later because of neglected gum health.
Once you’ve moved past the initial shock of a ‘pink sink,’ it’s time to talk about the nuances that many people miss—especially those who have invested in high-end dental work. There’s a common, dangerous myth in the world of family dentistry that once you get a crown, an implant, or a set of veneers, those teeth are somehow ‘invincible.’ In reality, the opposite is true. While the porcelain itself won’t decay, the interface where that material meets your living gum tissue is the new front line of your oral health. If you treat your new smile like it’s made of indestructible plastic, you’re walking straight into a very expensive trap.
Restorations Aren’t Bulletproof Armor
The biggest ‘oops’ factor I see involves people switching to electric brushes and then using abrasive charcoal or ‘extra whitening’ toothpastes. They think they’re keeping their new investment pearly white, but they’re actually micro-scratching the glaze. I’ve heard countless stories of people wondering the reason your porcelain veneer feels rough to your tongue only to realize they’ve been essentially sandpapering their smile twice a day. When you use an electric brush, the high frequency amplifies the abrasiveness of your toothpaste. If you’ve looked into expert tips for perfect results with veneers, you know that a non-abrasive gel is your best friend. Anything else is just asking for a dull, stained restoration within a few years.
Does the high-speed vibration risk loosening your expensive dental implants?
This is the question that keeps many of my readers up at night. You’ve spent months on a surgical process, and now you’re worried a sonic motor will rattle the hardware. Here is the nuance: while the vibration won’t unscrew the post from your jawbone, it can highlight issues you didn’t know were there. A study published in the Journal of Oral Implantology suggests that the health of the ‘biological seal’—the way your gums grip the implant—is actually more delicate than the attachment to a natural tooth. If you feel a strange sensation, it’s often why your dental implant feels like it is vibrating when you chew rather than a structural failure. The ‘vibration’ is often just the brush hitting the metal substructure, but it’s a great reminder that you need to be surgical with your cleaning, not aggressive.
#IMAGE_PLACE_HOLDER_C#
The Hidden Margin Trap You’re Likely Missing
The contrarian truth about cutting-edge techniques in cosmetic dentistry is that the better the dentist, the thinner the margin—but that margin is still a ledge for bacteria. Many patients stop brushing right at the gum line because they are afraid of ‘pushing’ the gum away from their veneers or crowns. This creates a stagnant zone where plaque hardens into tartar. You might notice why your gums look dark around a crown; often, that’s not the metal showing through, but chronic inflammation from being too ‘gentle.’ You have to find the sweet spot: enough vibration to clear the margin, but not enough pressure to cause recession. Have you ever fallen into this trap of being too scared to clean your expensive dental work? Let me know in the comments.
If you really want to level up your maintenance, you need to stop relying solely on string floss. I have found that for anyone with high-end restorations, a quality water flosser is non-negotiable. It is not just about the convenience; it is about the force of micro-bubbles reaching places a thread simply cannot. When I first got my dental work, I struggled with how to tell if your dental bridge is trapped with food because standard floss would often snag or miss the hidden pockets. Switching to a pressurized water tool felt like power-washing a driveway—the amount of debris it clears from under crowns and bridges is honestly shocking. This is vital because the truth about the lifespan of a dental implant is that it depends entirely on your ability to prevent biofilm buildup at the base of the post.
Ditch the String Floss for This Power Tool
I recommend using a water flosser on a medium setting twice a day. Why? Because the ‘biological seal’ around an implant is less vascular than the one around a natural tooth, making it more prone to silent infections. A study published in the International Journal of Oral & Maxillofacial Implants highlights that mechanical plaque control is the single most important factor in preventing peri-implantitis. If you fail here, you might eventually need to know how to fix the gap that appeared between your gums and your new bridge due to tissue loss. I personally use a cordless model in the shower; it’s less messy and ensures I never skip a day.
#IMAGE_PLACE_HOLDER_D#
How do I maintain dental implants over time?
Maintenance is a lifelong commitment of specific hygiene and professional oversight. Beyond your daily routine, you need a dentist who understands the specific torque and cleaning requirements of titanium or zirconia. This is where family dentistry tips for a lifetime of healthy smiles really come into play. You should be getting professional ‘debridement’ with specialized plastic or titanium instruments that won’t scratch your hardware. I’ve seen too many people treat their restorations like ‘set it and forget it’ appliances, only to face complications five years down the road. Treat your implants like the medical-grade hardware they are.
Smart Technology Is Redefining Dental Longevity
Looking ahead, the industry is shifting toward ‘active’ maintenance. We are already seeing dental implants 2025 innovations that include integrated sensors to monitor pH levels and bacterial activity in real-time. In the near future, the future of dental implants will likely involve ‘smart’ crowns that can alert your phone if a loose screw is detected before you even feel a wiggle. This technology will take the guesswork out of oral health and move us into a truly preventative era. My challenge for you today: Pick up a water flosser and commit to using it on the lowest setting for one week. You will be amazed at what your toothbrush has been leaving behind.
The Most Surprising Lessons I Learned the Hard Way
The transition from a manual mindset to a high-powered routine taught me that discipline beats force every time. I had to swallow my pride and realize that my years of “vigorous” scrubbing were actually causing micro-trauma. I also learned that small changes, like investigating the reason your porcelain veneer feels rough to your tongue, can prevent minor irritations from becoming major dental bills. My biggest lightbulb moment? Realizing that family dentistry isn’t just about cleanings; it’s about adapting your daily tech to your body’s unique biological needs.
Tools That Actually Protect Your Expensive Dental Work
If you want to keep your smile in peak condition, I personally recommend a three-pronged approach. First, prioritize a non-abrasive enzymatic gel over standard whitening pastes to keep your cosmetic dentistry secrets looking brand new. Second, invest in a water flosser with a specialized “ortho” tip; it is a game changer for getting under bridge margins. Finally, never skip the pressure sensor feature on your brush. It is the only reliable way to ensure you aren’t undoing the work your dentist spent hours perfecting.
Take the First Step Toward a Pain-Free Clean
The future of oral health is bright, especially with dental implants 2025 innovations making maintenance easier than ever. Don’t let the “pink sink” discourage you from upgrading your routine. With a lighter touch and the right tools, you can enjoy a professional-level clean without the horror-movie side effects. Have you ever felt a strange sensation like why your dental implant feels like it is vibrating when you chew while using your electric brush? Let me know in the comments below!
#IMAGE_PLACE_HOLDER_E#