I was halfway through a presentation for a high-stakes client when I heard it. Snap. It felt like a tiny whip hitting the inside of my cheek. My first thought wasn’t about my teeth shifting—it was about where that little piece of latex landed. Did I just launch a rubber band at my boss? I spent the next twenty minutes trying to talk without moving my jaw, looking like a ventriloquist who’d lost his dummy. If you are wearing braces, you know that the rubber bands (elastics) are the unsung heroes of your treatment, but they are also the most likely part to fail at the worst possible moment. Whether you are in a meeting or on a construction site, a snapped elastic can feel like a miniature disaster. Today, I am going to show you exactly how to handle this gracefully so you can get back to your job without the dental drama. Have you ever had a rubber band fly out of your mouth in public? It is a rite of passage I would not wish on anyone.
Why Your Work Bag Needs an Orthodontic Survival Kit
I learned the hard way that being unprepared is the biggest mistake you can make. Early in my treatment, I snapped a band and tried to tie the two broken ends together with a piece of sewing thread I found in a desk drawer. Not only did it taste like old dust, but it also provided zero of the actual tension my teeth needed. In fact, the American Association of Orthodontists emphasizes that consistent wear is the only way to keep your treatment on schedule. Trying to ‘MacGyver’ a solution with household items can actually do more harm than good. I eventually realized that just like I have family dentistry tips for my kids, I needed a personal protocol for my own hardware. Keeping a small pack of elastics in your desk or car is a game changer. If you do not have them, the first step is to stay calm and assess if there is also a sharp wire poking your cheek because of the shift in tension.
Is a snapped elastic actually an emergency?
The short answer is no, but your brain might tell you otherwise when you feel that sudden release of pressure. Most people worry that their teeth will immediately sprint back to their original crooked positions the second a band breaks. They won’t. However, the discomfort can be real. You might start to feel the dull ache that usually comes after an adjustment. The key is to avoid the temptation to leave the other side on. If you wear a band on both sides and one snaps, take the other one out too. You want the tension on your jaw to remain even until you can replace both. If you are ever unsure about the specific pattern your orthodontist prescribed, it is always better to contact us or your local provider rather than guessing and moving your teeth in the wrong direction.
Stop the Uneven Tug of War Immediately
The moment that band snaps, your mouth becomes a lopsided suspension bridge. Orthodontic elastics work by applying specific, constant pressure to move your jaw or teeth into alignment. When one side fails, the remaining band continues to pull, creating an asymmetrical tension that can lead to significant discomfort. Think of it like a car with one flat tire; if you keep driving, you are going to ruin the alignment of the whole vehicle. Your first move should be to reach into your mouth and remove the elastic on the opposite side. It feels counterintuitive to stop the progress entirely, but maintaining symmetry is vital for your comfort. Failing to do this is often the reason your jaw aches every time you wear your aligners or elastics incorrectly. Keeping both sides off until you can replace the pair ensures your bite remains balanced.
Inspect the Hardware for Collateral Damage
Sometimes a snapping band is just a freak accident of latex fatigue, but other times it is a symptom of a mechanical failure. I once had a band snap because the tiny hook on my molar bracket had slightly bent, creating a sharp edge that sliced through the rubber like a razor. Take a second to run your tongue—or better yet, a clean finger—along the brackets where the band was attached. If you feel something sharp or out of place, you might be dealing with more than just a broken elastic. You might need to learn how to fix a sharp wire poking your cheek from your braces before you put a new band on. If the hook is gone or the bracket feels wiggly, you are looking at a situation where you should handle a loose orthodontic bracket before resuming your routine.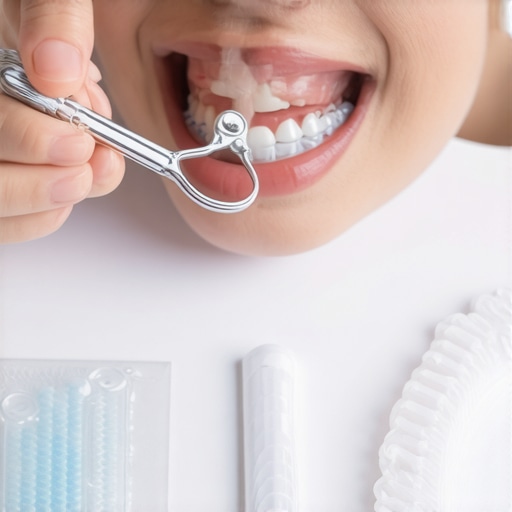
Master the One-Finger Re-Hanging Technique
Once you have confirmed the brackets are secure, it is time to re-band. Most people struggle because they try to use two hands in a space meant for one. The secret is to use your index finger as a guide and your thumb as the anchor. Hook the elastic onto the back molar bracket first—this is the ‘anchor’ point. Once it is secure, stretch it forward toward the front hook. I learned this the hard way during a movie. I tried to replace a band by feel in the dark and ended up hooking my inner cheek instead of the bracket. It was a painful lesson in why you should always use a mirror if available. If you find that your teeth feel slightly mobile during this process, do not panic; it is common to feel like your teeth feel loose during an orthodontic shift. Just ensure the band is seated deeply in the groove of the hook so it does not go flying across the room again.
Maintain Your Hygiene While You Are Mid-Swap
Every time you have to go into your mouth to replace a band, you are introducing bacteria. This is a great time to evaluate your overall cleaning routine. While the bands are out, take thirty seconds to check for trapped food particles that might be irritating your gums. Many patients find that the benefit of using a water flosser with your braces becomes obvious during these moments, as it clears the area around the hooks where elastics usually sit. Once the new bands are in, you might experience a familiar sensation. It is normal to manage the dull ache after your braces are adjusted or after you replace bands that have been off for a few hours. That pressure is just the sign that the work is starting again.While we are on the subject of precision, I see many patients making a massive mistake once they graduate from braces to the world of aesthetic enhancements. Many assume that once they have invested in cosmetic dentistry secrets, the maintenance phase is over. It is a dangerous myth. In fact, if you think a dental implant is a ‘get out of jail free’ card for oral hygiene, you are heading for trouble. Research published in the Journal of Periodontology indicates that peri-implantitis can affect up to 43% of patients if they neglect the soft tissue around the post. It is not just about the titanium; it is about the living tissue supporting it. This is where understanding how dental implants reshape your oral health in 2025 becomes a lesson in biology, not just mechanics.
Why your porcelain looks fake under the midday sun
The biggest ‘oops’ I see is the ‘Piano Key’ effect. This happens when patients push for the whitest shade possible without considering translucency. Natural teeth have layers; light travels through them and bounces back. If your veneers are too opaque, they look like Chiclets. This is often the reason your porcelain veneers look opaque and fake. Professionals know that how to pick the right shade for your new porcelain veneers involves looking at your skin tone and even the whites of your eyes to ensure harmony.  Another nuance is lighting. You might love your smile in the dentist’s chair, but the reason your veneers look different in sunlight versus indoors is due to metamerism—the way certain materials reflect colors differently under varying light sources. If you are considering a major shift, like choosing between veneers vs crowns, do not ignore the ‘trap’ of your natural aging process. Porcelain won’t yellow, but your remaining natural teeth will. If you don’t keep up with family dentistry tips or regular cleanings, your smile will eventually become a two-toned mosaic. Have you ever fallen into this trap of prioritizing a quick cosmetic fix over long-term dental harmony? Let me know in the comments.
I’ve spent a small fortune on my smile over the years, and I refuse to let a five-dollar piece of floss be the reason my investment fails. People often ask me why I am so obsessed with my ‘ortho-kit.’ It is because I have seen firsthand what happens when you ignore the tiny nooks and crannies that hardware creates. If you have a permanent wire, you know the struggle is real. I personally swear by high-pressure water flossers. In my experience, the benefit of using a water flosser with your braces or implants isn’t just about the speed; it is about reaching the sub-gingival space where traditional floss simply shreds against the metal. If you are dealing with permanent hardware, you must master the secret to flossing when you have a permanent wire retainer 2 or you will end up with localized gingivitis before you even realize there is a problem.
How do I maintain my dental implants and veneers over the long haul?
Maintenance is where most people drop the ball. For those of us with ceramic work, you have to realize that while the porcelain won’t decay, the tooth underneath and the gums around it definitely can. I use a non-abrasive, gel-based toothpaste because standard whitening pastes can actually micro-scratch the surface of your veneers over years of use. When it comes to more complex work, knowing how to safely clean a dental implant without scratching the post is the difference between a lifetime of success and a costly failure. The American College of Prosthodontists specifically recommends using plastic-coated interdental brushes rather than metal ones to avoid galvanic shock or surface damage to the titanium. I also make it a point to learn how to clean under a permanent retainer without breaking it, using a bridge threader that acts like a flexible needle. If you are ever in doubt about the truth about the durability of composite vs porcelain veneers, remember that porcelain lasts longer, but only if your hygiene is surgical in its precision.
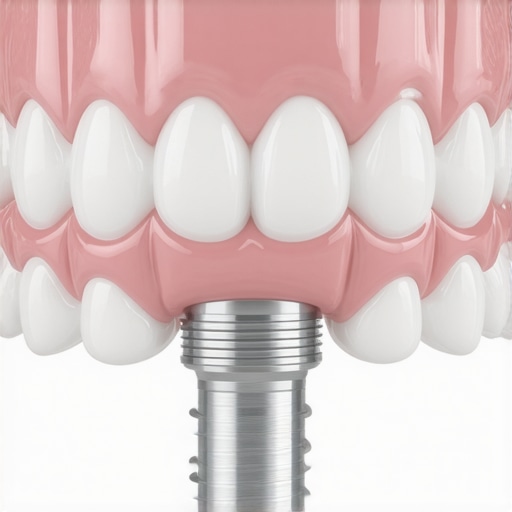
Looking ahead, I suspect we are moving toward a world where your bathroom mirror will do half the work for you. I’m already seeing dental implants 2025 innovations that redefine comfort and durability, including ‘smart’ implants that can detect early signs of bone loss or infection via integrated sensors. Until that tech hits the mainstream, you have to be your own advocate. Don’t just brush; audit your work. I recommend using disclosing tablets once a month—those little pink chewables that highlight plaque. It is a humbling experience to see exactly where you are missing, but it is the only way to ensure your ‘piano keys’ stay bright and functional. My advanced tip for today? Switch to a water flosser for one week and see if your gums stop bleeding when you eat crunchy bread. It is a game-changer you won’t regret.
The Lessons My Dental Hardware Taught Me the Hard Way
After years of navigating the ups and downs of braces and aesthetic upgrades, I’ve realized that the small habits dictate the big results. One of the biggest ‘lightbulb moments’ I had was realizing that orthodontic elastics are not just suggestions; they are the literal engine of your progress. If you skip them, you aren’t just pausing your treatment—you’re potentially letting your bite drift into a position that requires even more work later. Another hard-earned truth is that your gums are the frame for your dental masterpiece. You can have the most expensive veneers expert tips for perfect results, but if your gum line is receding due to poor hygiene, the aesthetic will never look right. Finally, always listen to your body’s signals. If a band keeps snapping or a crown feels off, your mouth is trying to tell you something before it becomes a weekend emergency.
My Must-Have Toolkit for a Flawless Smile
I don’t leave the house without my ’emergency kit,’ and neither should you. My first recommendation is a high-quality water flosser. As we discussed, the benefit of using a water flosser with your braces is unmatched for clearing debris from hard-to-reach hooks. I also swear by ‘disclosing tablets’ which are a cheap way to audit your brushing. For those with permanent hardware, a pack of flexible bridge threaders is essential to master how to clean under a permanent retainer without breaking it. Lastly, keep the contact us page of your orthodontist bookmarked on your phone. Speed is your best friend when hardware fails.
Your Smile Is an Investment Worth Protecting
Taking care of your teeth can feel like a part-time job, but the confidence a healthy smile brings is priceless. Whether you are currently swapping out rubber bands every few hours or exploring how dental implants reshape your oral health in 2025, remember that you are doing this for your future self. Don’t be discouraged by a snapped band or a bit of sensitivity. These are just small hurdles on the path to a lifetime of dental health. By following family dentistry tips for a lifetime of healthy smiles, you’re setting a standard for your overall well-being. You’ve got the tools and the knowledge—now just keep going.
Have you ever had a dental ‘disaster’ happen at the most inconvenient time possible? Let me know how you handled it in the comments below!